Thursday, December 31, 2009

Wishing all a Happy 2010!!!

I'm wish everybody a Happy New Year!!! May 2010 be a wonderful year for all of us. 2009 have been a bittersweet year for me. I got married but lived far away from my families and friends. I miss them a lot. I hope 2010 be a bright future, good health and prosperity with my hubby and hope to see my family soon.. ♥♥

With that being said, my last 2009 post with end with Fried Honey Chicken Drumsticks. I never like drumsticks but its my hubby's favorite part of the chicken. So this is for him..


Fried Honey Chicken Drumsticks

Ingredients
4 chicken drumsticks
3 dry chillies - soaked in hot water
2 cloves garlic
4 small red onions - cut in cubes
1 candle-nut
2 tbsp honey
2 tbsp dark soy sauce
abt 1 tsp sesame seeds

Deep-fried the drumsticks half cook. While the drumsticks are cooking, blend chillies, onions, garlic and candle-nut in a food processor until it become to a paste.

Heat large saucepan with a little oil and saute the blended ingredients until fragrant. Add honey, dark soy sauce, deep-fried drumsticks and sesame seeds. Add salt to taste. Cook until the drumsticks are fully cooked and coated with the rest of the ingredients. Remove from heat and serve hot with plain rice.

Have a happy, happy 2010 everybody!! Best wishes. ♥♥♥♥

Wednesday, December 30, 2009

Kuih Keria (Fried Sweet Potato Donut)


Yesterday, I bought some sweet potatoes. I decided to make some Kuih Keria a.k.a Kuih Gelang (the simple fried up sweet potato dough with sugar coating). One of my favorite Malay kuih. Unfortunately, hubby never had this before and he doesn't seem to like it very much.  Its all good, I have more for myself.. hehe.. I think I must make him eat all the kuihs when we go back Singapore.. Looking at the pic, making me miss my mom's kuih keria... She made it so yummy, you just want more..


Kuih Keria (Fried Sweet Potato Donuts)

Ingredients
600 gm sweet potatoes - peeled and cubed
300 gm all-purpose flour
250 gm sugar
250 ml water
125 ml thick coconut milk - from half a coconut
salt to taste
cooking oil

Boil cubed sweet potatoes until soft. Mash the sweet potatoes and combine with all-purpose flour, coconut milk and salt. Knead into a soft dough.

Dust hands lightly with flour and roll each dough piece into a round ball. Flatten it slightly with the back of your hand. Slowly using your finger to poke a hole through and fashion dough into a ring. Set aside. Repeat with the rest of the dough.

Prepare oil in fryer at medium heat, and deep fry for 5-8 minutes or until golden brown. Remove and drain on paper towel.

In a small pot, cook sugar and water in a low heat till syrupy and thick. Add fried sweet potato rings and keep stirring till all potato rings are well coated with syrup and eventually crystallized.

Serve it warm or cold.

Wednesday, December 23, 2009

Date and Cinnamon Squares


I would like to wish everyone a Merry Christmas. I'm so looking forward to spend time with hubby as he don't have to work for 4 days. Yay!! Talking about Christmas, I like to see the decoration of some houses in this town,  very bright and colorful. There's not much of decoration at the streets, unlike in Singapore, Orchard Road and all the shopping malls, definitely, have beautiful decorations. We didn't do much, just a Christmas tree. It was fun, decorating it together. Due to in tight budget, we decided to recycled everything that we used last year for our tree. Perhaps next year, we have a better tree and decorations. :)


Anyhoo, today recipe is Date and Cinnamon Squares. I had 2 containers of date that have been sitting in my refrigerator for a while. At first, I thought of making cookies with it but I changed my mind. The recipe said 600g of dates, I was like, wow that's a lot of dates!! But after chopping and mixed with water, its not much as I thought. I really hate the chopping part. I cant believe, after chopping those dates I got a blister on my finger! Lol!!!! Well, it turned out good. Hubby loves it! :)

Date and Cinnamon Squares
(BAKING A Common Sense Guide Book by Bay Books)

Ingredients:
600g (3-1/3 cups) pitted whole dried dates, chopped
1 tsp bicarbonate of soda (baking soda)
125g (4-1/2 oz) unsalted butter, chopped
155g (2/3 cup) soft brown sugar
2 eggs
125g (1 cup) all-purpose flour
60g (1/2 cup) self-rising flour
1/2 tsp ground cinnamon, plus 1/2 tsp, extra
60 g (1/2 cup) Icing (Confectioners') sugar

  1. Preheat the oven to 350○F / 180○C. Grease a 9 in (23cm) square shallow tin and line the base with wax paper.
  2. Combine the dates and 500ml (2 cups) of water in a saucepan. Bring to the boil, then remove from the heat. Stir in the bicarbonate of soda and mix well. Allow to cool to room temperature.
  3. Cream the butter and sugar in a large bowl using electric beaters until pale and fluffy. Add the eggs one at a time, beating the cinnamon into a bowl, then fold into the butter mixture alternately with the date mixture.
  4. Spread into the prepared tin. Bake for 55-60 minutes, or until a skewer inserted into the center comes out clean. Cool in the tin for 5 minutes, then turn out onto a wire rack to cool completely.
  5. Cut into 36 pieces and place on a sheet of greaseproof paper. Sift the combined icing sugar and extra cinnamon over the cubes and toss to coat.  Serve immediately.

Notes:
  • The coating will be absorbed into the cakes quite quickly if left to stand.
  • Do not coat with the icing sugar if you intend to store them. 
  • Stored in an airtight container, for up to 4 days, or up to 3 months in the freezer.
Happy Holidays!

Monday, December 14, 2009

Sweet and Sour Chicken


Taking photos of the food to post here, is not easy for me. I took many photos but I'm still not too satisfied with them. I did my homework by reading the photography blogs. It was very helpful and great tips. I really love how their photos turned out but I do not know why my photos did not turn out great! So my dear readers, please bear with me, if the photos are not so clear or blurry. I'm still trying to improve on my photography skills. Many thanks..

Anyhoo, this is my hubby's favorite. Sweet and Sour Chicken served with plain white rice. He used to order the same food from the Chinese restaurant here. Their sweet and sour chicken is just the sauce and deep fried chicken and no vegetables in the sauce at all. Totally different from the sweet and sour dish I get in Singapore.  So whenever, I cook his favorite dish, I always cook it the way I like.. with vegetables.. He just want more and simply couldn't resist it. He don't even want to order Sweet and Sour Chicken from the restaurant anymore.

Next time, I am gonna try Sweet Sour Fish and Sweet Sour Shrimps and Sweet and Sour Chicken with Lemon.. :)

Ingredients
1 pound of boneless and skinless chicken thighs or breasts
Marinade
2 tablespoons oyster sauce
Salt and pepper, to taste  
Batter
3 tbsp all purpose flour
3 tbsp corn flour
1/2 tsp baking soda
1/4 to 1/2 cups water, or as needed 
Vegetables
1/2 green bell pepper
1/2 cup pineapple chunks (reserve the juice from can)
1 teaspoon finely diced green onion 
Sweet and Sour Sauce:
1/4 cup ketchup
1/2 cup pineapple juice (reserved juice from canned pineapple)
1/4 cup rice vinegar
1/2 tsp oyster sauce
2-3 tbsp brown sugar
1 tbsp cornstarch mixed with 4 tbsp water
Oil for deep-frying, or as needed

Cut the meat into bite-sized pieces. Add the marinade ingredients to the chicken. Marinate the chicken for 20 minutes in the refrigerator. While the chicken is marinating, prepare the vegetables and batter. Cut the onions and green bell pepper into chunks. Drain the pineapple and reserve 3/4 cup of juice.
 
To prepare the batter, mix all the dry ingredients together. Add water to make slightly thick batter. Add chicken in the batter until it is well coated. When all are ready, deep fry in pre-heated oil. Place the deep-fried chicken pieces on a tray lined with paper towels to drain.
 
In a bowl, mix reserved pineapple juice, rice vinegar, ketchup and oyster sauce. Heat the saucepan with a little oil and stir-fry the onions and green pepper for about 2-3 minutes. Add the mixed sauce and brown sugar together and keep stirring to dissolve the sugar. Then add the pineapple chunks. Bring to a boil and add the cornstarch mixture, stirring quickly to thicken. Taste and adjust seasonings, adding salt, or more sugar or vinegar if desired. Pour the sauce over the chicken. and garnish with diced green onions. Serve hot.

Notes:
  • Deep frying the chicken - The process is quick but the chicken should not turn brown immediately. If it does the oil is too hot. The temperature of the oil should be around 360 to 375 degrees Fahrenheit.
  • Do not cover the chicken after you have deep fried.

Friday, December 11, 2009

Fried Rice (Nasi Goreng)


Fried Rice (Nasi Goreng) is a popular dish among Asians. Malays and Indonesians fried rice often accompanied by fried egg, keropok (prawn crackers), fried chicken or satay. Chinese fried rice is serve as a main dish or as a side dish. You will definitely see fried rice in Chinese or Malay/Indonesian Restaurant in their menu. In the photo, my fried rice was accompanied by strips omelet, bergedil, keropok and salad. Yummy!!!!

The  simplest and the easiest fried rice that my mom taught me was Egg and Black Pepper fried rice; using sliced onions, sliced green chilli, scrambled eggs, black pepper, salt to taste and pre-cooked rice.  That was my first fried rice. Before I knew the tricks of cooking fried rice, my fried rice was terrible. I had soggy fried rice before; vegetables were still hard, etc... it was funny! I learn as I go and always tell myself, that it will be better the next time.. :)

Ingredients
2 cups pre-cooked rice
1/2 onion, sliced thinly
60 gm long beans, sliced thin
50 gm carrot, cut into small cubes
50 gm green capsicum, cut into small cubes
30 gm dry shrimps, soaked and pounded
1-2 tsp chilli paste
2 tbsp vegetable oil
salt to taste

Heat oil in a wok or frying pan. Stir fry onions and chili paste and mix well. Add the pounded dry shrimps, carrots and green capsicum. Stir fry for about 3 minutes then add the long beans and salt to taste. Lastly add the cooked cold rice, mix well for 2 minutes before turning off the heat. Serve the fried rice with strips omelet on top. 

Notes:
When cooking fried rice, the main key is using previously cooked rice. I usually keep the pre-cooked rice in the freezer for one or two days. Then when I want to cook fried rice, I gently rub the rice between my fingers to get rid of any clumps before cooking. By using previously cooked rice it reduces the chances of ending up with a wet and soggy dish.

For cooking the egg in fried rice, you can do two different ways; scramble the egg and mix it in with the rice or cook scrambled egg separately, then add to the rice in the final stages of cooking. Some also prefer to fry the beaten egg and cut it into strips to use as a garnish.

Tuesday, December 08, 2009

Macaroni Goreng Taucu ( Fried macaroni with salted fermented soy beans)


I bought a bottle of taucu at the Asian store, wanting to cook Mee Siam the other time and I did. Initially, I do not know how much taucu I have to use for the mee siam so I just bought the big bottle (450g, 15.09oz). When I called my mom, asking her how to cook her mee siam, she told me that I do not have to use a lot of taucu. Ahhh!!! Well, the thing is, I don't use taucu except for cooking mee siam and now I have plenty of taucu left in the refrigerator..

What is Taucu?? Taucu is actually soy beans that have been salted and fermented. I know it is commonly used in Malay and Chinese food. I am not sure if Indians use taucu a lot in their cookings.. ( anyone knows, maybe you could tell me..). So I looked up in my Malay recipes book and found Macaroni Goreng Taucu and Ikan Masak Taucu. Yay!! I will whip up some Ikan Masak Taucu soon..


Macaroni Goreng Taucu (Fried macaroni with salted fermented soy beans)

* my fried macaroni dish is only consist of mushroom and carrot, but you can add raw shrimps in this dish

Ingredients
200 gm macaroni, cooked and drained
3 cloves garlic, thinly sliced
1.5 cm ginger,  thinly sliced
4 mushroom, sliced
1 carrot, sliced
1 tbsp taucu (salted fermented soy beans)
2 stalks scallions, chopped
1 tbsp sambal (chilli paste)
1/2 tsp dark soy sauce
Salt for taste - if required

Heat some oil in the wok. Fry garlic and ginger until the fragrant. (if you using raw shrimps, this is the time to add). Add mushroom, carrot, chilli paste, taucu, scallions and dark soy sauce. Sprinkle some water if its too dry. Stir for about 1-2 minutes then add the macaroni. Add salt to taste (if required). Stir well and remove from heat. Serve with chopped scallions for garnishing.

Thursday, December 03, 2009

Layered Mac & Cheese Taco


A lot of people like to eat Macaroni & Cheese.  At the store, they  sell mac & cheese in a box, easy, does not require too many ingredients and its fast. Cook it over the stove or just microwave; even faster. I have one box of mac & cheese left in the pantry and I thought what should I do with this mac & cheese. My hubby prefers his way of making mac & cheese, and I prefers mine... I have to think of something so that both will really enjoy... :)

So, I prepared the mac & cheese as indicated in the box. Then I prepared the taco meat as indicated in the taco seasoning mix package. (Click here). I added 1/2 cup sour cream in the prepared mac & cheese dinner. and spoon about 1/2 of the dinner mixture into 8-inch square baking dish. Spread the meat mixture and shredded cheddar cheese. Repeat for another layer; cover with foil. Bake for 15 minute. Then top with chopped tomatoes and shredded cabbage (or you can use salsa) and spread more shredded cheese and bake again for another 5 mins uncovered.

Serve with toasted tortillas or tortillas chips. Yummy!!! :)

Monday, November 30, 2009

Triple-Layer Chocolate Bars


The Triple-Layer Chocolate Bars sounds like difficult but it is easy to make and use just a few ingredients. I made these last night. Since it just takes 2 hours to set in the refrigerator, I wanted to wait to try these bars.  After cleaning the kitchen, my eyes and body just couldn't wait any longer. I went to bed early last night. So, we had one bar each as desserts for lunch today. Its just funny because, I was hesitated to take a bite. Chocolates are  my favorites and its the reason why I made these but I dunno why there was a hesitation.. LMAO!!! Well, hubby tried first then me. He said its delicious, chocolaty and very rich... One bar is good enough since my bars were a little too big.. I overlooked and had 15 big bars instead.... should have cut it a little smaller to get 24 bars as said in the recipe.... hehe..
 
Triple-Layer Chocolate Bars from Kraft Foods 

Ingredients
1 pkg (8 squares) BAKER'S Semi-Sweet Chocolate, divided
10 tbsp butter, divided
1-1/2 cups HONEY MAID Graham Cracker Crumbs
1 pkg.  (4-serving size) JELL-O White Chocolate Flavor Instant Pudding, or any flavor (I used french vanilla flavor instead) 
2 cups powdered sugar
1/2 cup heavy whipping cream 
 
LINE 9-inch square pan with foil extending over edges to form handles. Microwave 4 of the chocolate squares and 5 Tbsp. of the butter in large microwavable bowl on HIGH 2 minutes or until butter is melted. Stir until chocolate is completely melted. Add crumbs; mix well. Press firmly onto bottom of prepared pan. Refrigerate 10 minutes. 

MICROWAVE 1/3 cup water and remaining 5 Tbsp. butter in large microwavable bowl on HIGH 1 minute or until butter is melted. Add dry pudding mix; stir 2 minutes or until completely dissolved. Gradually add powdered sugar, stirring until well blended after each addition. Spread over crust. Refrigerate 15 minutes or until firm. 

MICROWAVE remaining 4 chocolate squares and cream in medium microwavable bowl on HIGH 2 minutes. Stir until chocolate is completely melted and mixture is well blended. Spread over pudding layer. Refrigerate 2 hours or until set. Lift out of pan onto cutting board. Cut into 24 bars to serve.

Notes:
  • It's best to use plastic bowl when mixing the pudding and use rubber or silicone spatula to spread over the crust.
  • For perfectly clean-cut, dip the sharp knife in warm water, wipe it dry between cuts.
  • Store leftovers in an airtight container in refrigerator.
  • It is not necessary to use the indicated brands, you can use the local brands, they are just as good. :)

Thursday, November 26, 2009

Happy Thanksgiving to all.


I wish everyone a Happy Thanksgiving. A wonderful reminder for us to be thankful and express gratitude. We were invited to have the Thanksgiving dinner at our close friend's home, so that means, I do not have to cook.. hehe.. Being, so far away from my family, they made us feel like a part of their family. I made a short speech to thank them while we were eating. Their mom felt so touched, she had tears in her eyes and gave me a hug....

Well, it was the traditional thanksgiving dinner,  and plenty of food.. and they were so delicious... I love the devils eggs, the sweet potatoes with  marshmallows and the coleslaw. Hubby loves the dressing, turkey drumsticks and the sweet potatoes. We even had our second rounds. Lol!!! For desserts, she made her delicious orange cake and chocolate pudding.. YUMMY!!!

From the bottom of my heart, I wanna thank Hales family for their friendship and to all my readers for your support. Thank you. ♥♥♥   


I was so hungry, and I dint take good pictures... So what you had for thanksgiving dinner?

Sunday, November 22, 2009

Lunch invitation and Battered French Fries


We were invited to eat deer meat at our friend's house. I don't think I ever had deer meat before. Although the deer meat was a little tough, some of it I can shred it with my fork and dip my rolls in it. I also like the chicken and the coleslaw. Excellent!!!! I wanted to take pictures of the deer meat but I was like so hungry, cant wait to eat, only managed to get a few pics on my plate after a few bites.. hehe.. Whenever, we were invited to have lunch or dinner over at our friend's place, they never disappoint us with their cooking. It's always yummy!!!!

After lunch, we played corn toss game at the yard. They said I am getting better at the game, even though I only a beginner. I never knew this game ever exist  until I came to this town. Corn toss is quite a popular game in this area. My partner and I, won 2 games but my hubby and his partner lose in all the games... It don't matter whether we win or lose, what matters most is that we had a great, fun time with good friends. :)

When we reached home at night, we were little hungry, so I prepared something easy and fast.. French fries.. I don't want to just have ordinary French Fries, something simple yet a little fancy with some dips. I made some dips; Aioli and Herb Mayo (Aioli is classic French garlic mayonnaise which is particularly good served with French Fries.. It was yummy...

Battered French Fries with Aioli and Herb Mayo


Left dip: Herb Mayonnaise, Right dip: Aioli

Ingredients:
4-5 medium potatoes, peeled and sliced 

Batter:
1 cup self-rising flour
1/2 tsp chilli powder
1/2 tsp baking soda
water to mix

Combine flour, chilli powder and baking soda in a bowl. Whisk in sufficient water to make a smooth batter. Dip the sliced potatoes into batter. Fry in hot oil until golden brown and drain on paper towels. To serve, arrange fries on a platter with the dips. 

Dips
Aioli
4-5 tbsp Mayonnaise
1 garlic
1 egg yolk

Put all the ingredients in the food processor.

Herb Mayo
4-5 tbsp Mayonnaise
handful of cilantro, basil, parsley, tarragon - finely chop

Stir the herbs into the mayonnaise.

Notes:
  • You can add salt to taste in the batter but without salt is also as good.
  • For Aioli, instead of using the food processor, finely mince/pound the garlic. In a bowl, whisk all the ingredients together.
  • Leftover dips, keep in the refrigerator.

Friday, November 20, 2009

Serunding (Coconut & Beef)


I always like to put a lot of serunding when I eat longtong, ketupat, rice or even on the bread.  I love the serunding  made by my mom's friend. She made it so yummy!! Serunding also reminds me of Hari Raya, because when ever there is longtong and ketupat, there's always serunding.

At first, I thought of combining the beef and coconut but than I decided to separate the two.  One is the original serunding that is is basically a dish of grated coconut fried with spices. The other one, serunding daging. It is the bone-dry, floss version of rendang that has a long shelf-life and needs no refrigeration. You may think cooking the serunding is hard but it is actually easy. The part where you have to shred the coconut and the beef, just takes a long time and your fingers ouch!! hehe...

My gurl friend gave me the recipe for serunding daging after I saw the photo. Looks yummy and I just had to give it a try... Thanks gurl.. :)


Serunding daging (Beef Floss)

Ingredients:
1 kg lean beef
500ml coconut milk
1 tbsp coriander seeds
vegetable oil
sugar and salt 

Spice paste:
15 dried chillies, seeded and soaked
2 inch ginger
5 lemon grass, finely sliced (I didn't use this since I can't get it here)
1 inch galangal, sliced ( I didn't use this since I can't get it here)
500 gm onions
10 cloves garlic

Cut the beef into large chunks. Place in a casserole pot and pour in enough water to cover the beef. Bring to a boil, or until beef is tender. Remove beef, drain and cool. When cooled, lightly pound the meat to break up the grain. Shred the beef finely.

Dry roast the spices separately until aromatic. Coarsely crushed the coriander seeds.

Blend all the spice paste ingredients finely – add a little coconut milk to make sure the paste is fine. Combine the shredded beef and spice paste. Toss to mix well. Heat a little oil in a wok. Fry the marinated beef, stirring constantly. Pour in the coconut milk. Bring to a boil. Then season to taste with salt and sugar. When the mixture is almost dry, add the coarsely coriander seeds. Cook over low heat, stirring continuously until the mixture is very dry, crumbly, and has turned to floss. Remove from heat and cool completely before storing in a dry, air-tight container.  


Serunding (Coconut)
No exact measurement for this serunding, as this is my recipe. After searching so many serunding recipes, I just decided to do my way..  It is not the best, but its good for me..

Freshly shredded coconut (from 1 coconut)
blended onion, garlic, ginger and dried chillies
turmeric powder
coriander seeds and fennel seeds

Dry roast the coriander and fennel seeds until aromatic. Coarsely crushed the spices. Heat oil and fry blended ingredients till fragrance arise.Add shredded coconut. Mix well. Season with salt and sugar and add the coarsely crushed spices. Constantly mixed all the ingredients, fry over low heat and till dry. Remove from heat and cool completely before storing in a dry, air-tight container.

Wednesday, November 18, 2009

Coconut

In Singapore, I never had to open a coconut and shred it myself. It is much easier to get fresh shredded coconut from the store or market. There is a store, next to my block in Singapore that has the coconut shredder machine to shred the coconut meat in seconds. He would have some already open, just waiting to be shredded.. and when ever I'm getting fresh shredded coconut, he would always asked me, " Mau ada kulit atau tak da kulit?" (want with or without the skin) and I would say "Tak mau kulit" (without the skin). In Tennessee, I do not have an "apek" store next block so I have to do it all by myself. So how to open a coconut???? The first time, it took me so many hours to open using the hammer and knife and then still have to shred. Lol!!! After learning the steps of opening a coconut from the web, it  is so easy and took me shorter time than before.. hehe...

To open the the coconut, you'll need towel, hammer, large nail and screwdriver. Be sure to have the hammer, nail and screwdriver clean before using on the coconut.

Preheat oven to 350 F. Using the hammer and nail to poke a hole in all the eyes of the coconut. Use the screwdriver to enlarge the holes. Drain out the coconut water in bowl. Place it in the oven and bake for 25 minutes or until you hear a pop sound (that means it had cracked).

Using a pot holder to remove the coconut from the oven (be careful because the coconut is hot). Hit it with a hammer until it splits. Do not knock the coconut on the counter top, please use the hard floor. Tap the shell with the hammer until the meat falls away from the shell. Pry the white coconut meat from the inner husk by using a small knife.

After rinsing in clean water, the pieces of coconut can then be shredded using a  shredder. Shred the pieces of coconut slowly and patiently. I still do get small cuts from shredding the coconut meats.. so be careful when handling the knife and shredder. You can also use the the food processor to grate the coconut meat; use pulse to your desired texture.

Once you taste freshly shredded coconut, you will never want to buy the dry dessicated coconut flakes from the store again.. and you'll be able to enjoy fresh coconut anytime.


My relatives in Malaysia had made nice little astray from the coconut husk. It look really nice so I took one as a souvenir and bring it to the US for decoration.


Notes:
  • Make sure the coconut water smells and taste sweet. If the coconut water does not taste sweet, then the coconut is inedible.
  • Do not throw the coconut water away, you can drink it immediately or use it to mix with the grated coconut to make the coconut milk/cream.
  • It is best to use right away when it's at its freshest. 
  • Fresh coconut meat can be stored in the refrigerator for up to six days and kept in the freezer for one to two months.

Monday, November 16, 2009

Mee Siam

Mee Siam is a popular dish in Singapore and Malaysia.. A  dish of thin rice noodles(vermicelli) in spicy, sweet and sour light gravy. Mee Siam is often served with dried or fried bean curd, boiled egg, lime, sambal and garnish with Chinese chives and spring onion. Some people would add taugeh (beansprouts) mixed in the thin rice noodles but I do not like the taugeh so I always omit taugeh in my cooking..

I called my mom to guide me because I only like the way she cooked it. My Mee Siam was simple, just boiled egg and chopped chives. Although my gravy had the spicy, sweet and sour taste, I think there was something missing. Since it was my first time, I think it was a good try. As my hubby do not usually eat spicy food, he said my Mee Siam was too spicy. He only had a little serving of my Mee Siam so I had to finish the Mee Siam myself... Lucky I did not cooked a lot, if not, Mee Siam would be my food for the week.. Lol!!

I am sorry that I am unable to share my Mee Siam recipe but here are some links that I found on the internet.

Singapore Mee Siam
MalaysiaFood.net 
Big Oven

Thursday, November 12, 2009

Mocha Cheesecake


This lovely recipe is from my friend in VA. She said she and mocha have something in common... LMAO!!!!

My hubby drinks a lot of coffee and this cheesecake is good for him. When he came home for lunch today, I just had to let him try the cheesecake before he goes back to work. So... after he takes the first bite, he gave me, thumbs up and said "bake this cheesecake from now on..."  I was so happy that he likes it.

But initially... After I took out the cheesecake from the oven, I thought I had baked it too long, that's why there were some cracks. It also rose high, then I left it to cool down and later, when I checked on it again, it already shrunk.. lol.. I thought my cheesecake won't be any good.. It was funny too because, I didn't take the first bite, I let hubby do the honor. Lol!!(dont tell him, he is my "guinea pig" to try all my cookings.. just kidding hun... but I guess he already know... hehe). Then I took my first bite and I really think the mocha cheesecake is so yum yum delicious!!  It tasted like the store cheesecake or perhaps even better than the store cheesecake.. Lol!!! Although the top is not pretty as the ones at the stores, the taste, was superb. We really enjoy a good cheesecake!

Many thanks Zee.♥♥♥  I'll bake one for you when you come visit..;)


Mocha Cheesecake

Crust
2 cups chocolate wafer crumbs (about 32 wafers) (I used vanilla wafers and add 2 tsp of cocoa)
1/2 cup sugar
1/2 cup butter, melted

Filling
3 packages (8ounces each) cream cheese, softened
1 cup sugar
3 tablespoons all purpose flour
4 eggs
1/3 cup heavy whipping cream
1 tbsp instant coffee granules
1 tsp vanilla extract
1 cup (6 ounces) miniature semisweet chocolate chips, divided


In a bowl, combine crumbs and sugar; stir in butter. Press onto the bottom and 2 in. up the sides of a greased 9-in. springform pan; set aside.

In a mixing bowl, beat cream cheese and sugar until smooth. Add flour and beat well. Add eggs, beating on low speed just until combined.

In a small bowl, combine cream and coffee; let stand for 1 min.

Then add to the cream cheese mixture with vanilla; beat just until mixed. Stir in 3/4 cup choc chips. Pour into crust. Sprinkle with the remaining choc chips.

Bake at 325 F on the middle rack for 50 mins or until center is almost set.

Cool on wire rack for 1 hr. Refrigerate overnight. Removes sides of pan let stand at room temperature for 30mins before slicing.


Notes:
  1. If you want to bake this cheesecake, I would advise to bake it one day earlier since you need to bake and keep it in the refrigerator for few hours (at least) or overnight before you finally slice the cheesecake.

Tuesday, November 10, 2009

Let's use Fabric shopping bag


I strongly recommend you to check out, Green Bag Lady if you want to eliminate plastic bags. Teresa, the Green Bag Lady who started this project  in early 2008, gives out free handmade fabric shopping bags at the Green Bag Lady events. I got my bag at Nashville Farmer's Market when they had their event there. I used it right away but did not take picture with the bag. This is my recent picture after our groceries shopping @ Walmart.


You can also get the pattern if you gonna make it yourself. I have some extra fabrics but no sewing machine. I am still waiting for hubby to get me Elna sewing machine then I'll make a few more fabric shopping bags.. Yay!!!

Thank you, Teresa for the bag and I will always put it to good use!

Let's Go green, live green and stay green! ♥♥♥

Monday, November 09, 2009

Roti Prata

Roti Prata is a pancake bread. This is a Singaporean and Malaysian (In Malaysia is it known as Roti Canai) Indian dish, an all time favorite suitable for breakfast, lunch, dinner or supper. Roti means bread in  Malay and Indian languages, while Prata means flat. Many Indian food outlets, serve not only plain prata or egg prata but many flavorings such as banana, chocolate, cheese, ice-cream, onion and a lot more. Roti prata is commonly served with curry or you can just have it with sugar, if you do not like curries.

After many unsuccessful attempts making roti prata, today, yess.. today, I managed to almost get it right. I need more practice to get that right texture and taste. It takes a lot of practice to be like a skilled prata man to transform the small, elastic dough ball into a paper-thin sheet prata. I don't think I can easily master the flipping and throwing part.. haha.. I found this roti prata recipe online. It was simple and easy to follow. Thanks Mama FaMi for posting the recipe. :)

Roti Prata/Roti Canai ( Mr. Niceghost33 from forum cari. com. my)

3 cups flour
1-1/2 cups water
1 tbsp margarine (I used butter)
salt to taste
2 tbsp condensed milk
1 tbsp cooking oil
extra margarine
  1. Mix water, salt and condensed milk.
  2. Sift the flour in a large bowl and make a well in the center. Add the liquid mixture bit by bit if kneading manually or pour the whole amount into the flour if using machine.
  3. Then add the cooking oil and margarine.
  4. Knead to form a soft dough. Leave it covered with a damp cloth for 30 minutes.
  5. Divide the dough into 10 portions and mold into balls.
  6. Coat the balls all over with margarine so that the dough won't stick to each other. Leave to rest for 2 hours (minimum).
  7. Spread one ball at a time on a smooth greased surface to form a very thin layer. Fold the four sides into the middle, flatten and fry on a hot pan with a little bit of oil. ( The picture above is not a flatten roti prata with folded sides. What I did was.... flatten the dough, pull the sides to get a thinner sheet, then rolled or bring the sides to the center to form a long dough, hold upwards and swirl the dough and flatten it again.) 
You can also check out Mama FaMi website for this recipe and step by step pics for Roti Prata. Since, I have to wait a few hours for the dough to rest, I should make more roti prata, save it in the freezer for future bites.. hehe.. I had this roti prata with fish curry. I will post on the fish curry tomorrow. :-)

Enjoy!!! ♥♥♥


here some kuih I made last Sunday. Made them in the morning to have them for lunch......

Friday, November 06, 2009

Telur Masak Kicap (Fried Egg in Sweet Soy Sauce)


This is the easiest dish to make... If you do not mind the soy sauce, try it.. hehe.. A lot of Singaporean and Malaysian loves to use Habhal Kicap Manis (Sweet Soy Sauce), I think  this is the best brand for Kicap Manis. I brought one bottle Habhal Kicap Manis to US but unfortunately, even after I wrapped the bottle with bubble wrap and lotsa newspapers, it got broken in my bag that I checked in. Unable to save any drops and all my things soaked with soy sauce!! :(

If you do not have the sweet soy sauce then mix light soy sauce and dark sauce and some sugar, I used more light and less dark one. No need salt at all..

Ingredients:
4 eggs,
1 small onion - slice
1 garlic - slice
1 green chilli - thinly slice
light soy sauce
dark soy sauce
sugar
sambal
  1. Fry the eggs. Set aside.
  2. Mix together the abt 1 tsp sambal, light soy sauce and dark sauce together in a small bowl.
  3. Heat a little oil (I used the oil from frying the eggs). Add in garlic. Fry till fragrant.
  4. Add the onion and green chilli. Fry till slightly soft.
  5. Pour in the soy sauce mixture and 1 tsp sugar and stir for a while and remove from heat.
  6. Pour the sauce onto the eggs.
  7. Sprinkle some chopped spring onions and ready to serve. 

Here is hubby's plate. He put the food on his plate nicely and told me to take a picture of his plate.. :)


Besides the fried egg in sweet sauce, I also made my teriyaki ginger chicken.

 
Just a side track a bit... A picture of family and friends from Singapore that I miss so much..
I am gonna add more pictures on this wall...  hehe..

Thursday, November 05, 2009

Tuna Mornay

I was feeling like having some French food last night. So I browsed through my recipes books and found Tuna Mornay!! Looks easy and it was easy. We had Tuna Mornay with slices of bread but about 1 hr later, both of us were hungry again.. haha.. Instead of me messing the kitchen  again, we drove to Sonic for some junior burgers and fries.. Lol!!!

What is Mornay?? Mornay sauce is a classic French sauce, a cheese and milk sauce made combining a roux with milk and adding Parmesan or Gruyere cheese. When making Mornay sauce, it is best to use hard or semi-hard cheeses. You can get away with some jack cheeses or hard goat cheeses. Bad choices of cheeses would be brie, blue cheese, cream cheese and fresh mozzarella . French tend to avoid any but white  cheeses when making Mornay sauce. I used shredded mozzarella, still looks creamy consistency but of course not the authentically French.☻ Mornay sauce is often served with vegetables, seafood or poultry dishes. It can be mixed in with pasta to make variant macaroni or alfredo or even lasagna. 

Tuna Mornay 
recipe from Step-by-Step Comfort Food
Serves 4 

Ingredients
60g (2-/14 oz) butter
2 tbsp all-purpose flour
500ml (2 cups) milk
1/2 tsp dry mustard
90g (3/4 cup) grated cheese (I used shredded mozzarella cheese and Parmesan flakes)
600g (1 lb 5 oz) tin tuna in brine, drained
2 tbsp chopped parsley
2 hard boiled egg, chopped
25g (1/3 cup) breadcrumbs (I used the Kikkoman Panco Japanese style breadcrumbs)
paprika, to season
  1. Preheat the oven to 350F (180C / Gas 4). Melt the butter in a pan, then add the flour and stir over low heat for 1 minute. Remove the pan from the heat and add the milk gradually, stirring until smooth between each addition.
  2. Return the pan to the heat and stir constantly until the sauce boils and thickens. Reduce the heat and simmer for 2 minutes. Remove from the heat, whisk in the mustard and 60g (1/2 cup) cheese until smooth.
  3. Flake the tuna with a fork, and mix into the sauce. Add the parsley and egg and season with salt and pepper. Spoon the mixture into 4 (250ml) (1 cup) ramekins (If you do not have these ramekins, you can use any other oven proof dish, like in the picture). Mix together the breadcrumbs and remaining cheese and sprinkle over the mornay. Dust with paprika. Bake for 15-20 minute, or until the topping is golden brown.


Notes:
Becareful when handling the ramekins when removing from the oven, they are very hot.

Tuesday, November 03, 2009

Kuih Bakar (Pandan Sesame Cake)


Kuih Bakar is a soft sweet pandan flavored kuih with sesame seed on top. Yes, they are one of my favorite kuih but I never thought of making them (in Singapore) because they can be easily found at most of the Malay stalls. Since I am very far away from the Malay stalls, to eat them, I have to make them myself.

Making kuih bakar was not that hard, as I thought it would be. It was easy and fast. I do not know how to get my kuih bakar to be darker green. Since the pandan leaf did not leave dark green color to my batter, I added the green food color and pandan flavoring essence. I do not like the pandan flavoring essence because it has no pandan taste or smell, more like peanutty smell. I don't use the pandan flavoring essence often but I do not want to throw it away either., so once a while, I just use it....  How do you make pandan paste?  Put the pandan leaves and blend it into a paste???? Can anyone help me?

My kuih bakar do not look as great as the ones I saw Za's blog, Stay At Home Mom and other blogs and also at the Malay stalls. :( I decided to use Za's recipe instead the one from my recipe book. Despite the pale green color, my kuih were not too bad actually. They were sweet and soft. I just have to practice more to perfect it.

Left pic- before putting it in to the oven
Right pic - after removing it from the oven

Recipe from Za, Stay At Home Mom
(Quantity: 30 pieces kuih from this recipe)

Ingredients:
1 cup sugar
2 cups all purpose flour + 1/2 tsp salt (mix)
2-1/4 cups of coconut milk
4 large eggs
2 tbsp of melted butter
1 tsp of pandan paste + 1 cup water (mix) (I used one pandan leaf and mix into the batter and add a few drops of the green food color and pandan flavoring essence)
sesame seeds - as much as you want

Pre-heat oven to 325F. and greased the muffin pan (I used the spray canola oil).
Beat the eggs, then add milk, butter and pandan paste mixture. Stir until well combined.
Pour into the flour + sugar mixture and use a whisk to mix the ingredients till smooth. (I used a sieve to filter the batter into the muffin pan)
Pour the mixture to fill 3/4 of the muffin pan. Sprinkle with sesame seeds.
Bake for 30 minutes or until the edges are golden brown and a skewer comes out clean.

Monday, November 02, 2009

Fried Bee Hoon


I miss eating mee or bee hoon goreng mama. They are simply Fried Noodles. The word mama refers to Indian  man. So whenever, we say mee goreng  mama, it refers to the Indian Fried Noodles. I have eaten the worst mee goreng mama and the best mee goreng mama. I like the mee goreng mama at Beach Road. For $2.50 or $3.00 (cant remember the cost) per plate, you get  your noodles with ground mutton, diced potatoes, vegetables and maybe some diced tofu in your noodles. At some other places, you just get noodles with vegetables. Yucks!
 

My mom always have a tub of blended onions, garlic and chillies in the refrigerator. They come in handy when she  wants to cook fried rice or noodles and some other dishes. Here, in TN, I do the same thing too.  I made a  tub of onion, garlic and ginger and another tub of onion, garlic and chilli. I saw a chilli paste with soy bean oil at Wang's Asian store in Nashville and got 1 bottle to see if its any good. Oh my.. they are simply delicious. Its mild hot but to me, its not even hot at all. I love the taste with the crunchy shrimp and fish in the paste. The chilli paste has been cooked and you can use it as a sandwich spread. I am getting more bottles when I go to Wang's again. :)

Recently, I found a website "Welcome To Rozzan's Shared Recipes" that have a recipe to make the mama's sambal. I am sure to make the sambal so I can have my very own mee goreng mama.. hehe.. :)

My style Fried Bee Hoon
Serves 2

Ingredients
215g Bee Hoon (Soak the dry bee hoon in hot water first to soften.)
1 tbsp of my blended onions,garlic and ginger (U can use 1 small onion, diced for this recipe)
1 green chilli - thinly sliced
Cabbage - shredded (about a handful)
1 potatoes - diced and boiled
1 tomato - diced
3/4 cup ground cooked beef
1 egg
Salt to taste
2 tbsp of vegetable oil

I mixed these together for my sambal 
2 tbsp chilli paste
1 tbsp light soy sauce
1 tbsp dark soy sauce
1 tsp vinegar
1 tbsp tomato ketchup
  1. Heat pan, add oil and fry onion for a few minutes, then the green chilli and cabbage. 
  2. Add sambal, tomato, ground beef, potato and salt. Then add the noodles. Stir until all well combined. 
  3. Make a hole in the center and break the egg. Let the egg half cook before mix together with the noodles. 
  4. Once all well mixed, turn off heat. 
  5. Serve with fried egg, slices of cucumber and chilli/tomato sauce.
Notes:
  • It is much easier to use a wok than large pan. (it is little messy using a large pan coz I do not have a wok here)
  • Cook the egg first in a smaller pan, scramble, half cook and let it aside before adding to the noodles.
  • If want your fried noodles to be slightly wet, pour some water (1/2 cup) to the noodles before turning off the heat.

Sunday, November 01, 2009

S&SB: White Chocolate and Orange Cookies

Sweet and Simple Bakes has chosen white chocolate & orange cookies. The light, orangey and chocolate flavor is so delicious. I cannot help eating them the minute I cooled the cookies of the cooling rack! Thumbs up for the cookies... I am sure to make them again...

White Chocolate & Orange Cookies
Makes 2 dozen

Ingredients
115g unsalted butter, softened
200g caster sugar (superfine)
1 egg
Grated zest of 1 orange (2 to 3 tsp)
1 tsp vanilla extract
200g plain flour
½ tsp bicarbonate of soda
¼ baking powder
¼ tsp salt
225g white chocolate chips (milk or dark chocolate)

Preheat the oven to 190oC/170oC fan oven/375oF/Gas mark 5.
Beat the butter and sugar. Add the egg, orange zest and vanilla extract.Sift together the dry ingredients.
Stir the dry ingredients and chocolate chips into the butter mixture and combine.
Roll into balls. Use your fingers to flatten onto a non-stick baking sheet 5cm/2in apart. Bake for 8-10 minutes. Cool for five minutes and transfer to a cooling rack.
When cool, store in an airtight container for up to four to five days.

Friday, October 30, 2009

Kuih Bom ( Fried Sesame Balls)


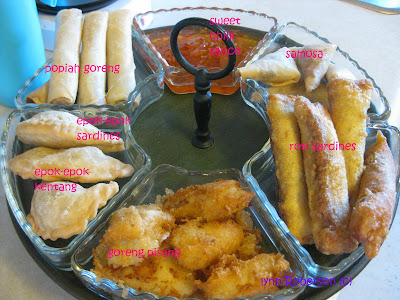
Kuih, either sweet or savory, I like all. I used to go to the Malay stall near my place, and get a few kuih-muih for breakfast before going to work. Just to name a few of my favorites; epok-epok sardines, abok-abok. popia goreng, kuih lapis, ondeh-ondeh, kuih keria, lopes and lot more.... My mom made kuih-muih for her stall  everyday and I used to help her making some kuih. (To understand better what is the meaning of kuih, click here.)

Although I have my kuih recipe book with me here, I have to searched online for guidance and tips before I start cooking since my mom is so far away. (well I always do that anyways.. hehe..)

Today, I made Kuih Bom (Fried Sesame Balls)  for afternoon snack. It is almost similar to Ondeh-Ondeh but Ondeh-Ondeh is boiled. Kuih Bom is made with glutinous rice flour and coated with sesame seeds. In some recipes, they add mashed sweet potato to the dough. Traditionally the filling is cooked sweet coconut but there are also variety of fillings, such as ground peanuts, bean paste and kaya. 


Recipe from "Aneka Minuman Petang" recipe book

Ingredients

Fillings:
150 gm sugar
150 palm sugar ( I used brown sugar)
125ml water
Grated coconut (from 1/2 coconut)
2 screwpines
1 tsp corn flour + 1 tbsp water

If you using palm sugar, make sure to chop the sugar first.
Combine both sugar, knotted screwpines and water in medium saucepan in a low heat. Leave it to simmer until the sugar dissolve. Add the grated coconut and stir well.  Stir at all times and do not leave the mixture to dry out. While it is still slightly wet, add the cornflour mixture. The filling will slightly be thick. Turn off the heat and leave the filling to cool down completely before using.

Dough:
300 gm glutinous flour
120-130ml coconut milk ( from 1/2 coconut)
pinch of salt
sesame seed
vegetable oil

Combine the glutinous flour and salt in a medium size bowl. Add the coconut milk bit by bit and knead into a smooth dough. Knead until the dough is not sticky to hand. Then shape into balls. Flatten each ball and put about 1 tsp of filling then reshape into balls. Coat fully with sesame seeds. Heat oil and deep fry the sesame balls over medium heat until golden brown.

Tips:
  • To avoid kuih bom to "explode" while cooking, make sure it is totally covered with oil. You have to give some TLC... The temperature should not be too high and do not fry them too long. It is best to deep-fry immediately. 
  • However, Kuih bom is best eaten when it is cold to avoid burning your tougue.

Thursday, October 29, 2009

Begedil (Potato cutlets)

These are my all-time favorite comfort food and it is also my hubby's favorite now.
Begedil is a deep fried potato cutlets. Mashed, shaped, coated and fried.
It is a common Malay side dish. Usually you have it with Nasi Padang or Mee Soto. 

They are so easy to make.


You can either boil or deep-fry the potatoes. Works both ways. I used 3 medium size potatoes. Remove the skin and cut into cubes. This time, I boiled  the potatoes but I much preferred them deep-fried.

Mash the potatoes in a dry bowl.


Some like it plain and others like to add cooked ground beef. If you like to add ground beef or chicken, make sure to cook the meat ahead and set aside to cool.

Here, I added cooked ground beef, chopped cilantro and spring onions, fried shallots, salt and pepper to taste. Mix thoroughly.


Shape into medium sized balls with the palms of your hands before flattening.

Lastly, coat begedil in beaten eggs and deep-fry till lightly browned.


Related Posts Plugin for WordPress, Blogger...