Wednesday, July 30, 2008

Cookie Carnival (July) - Blackberry Almond Bars


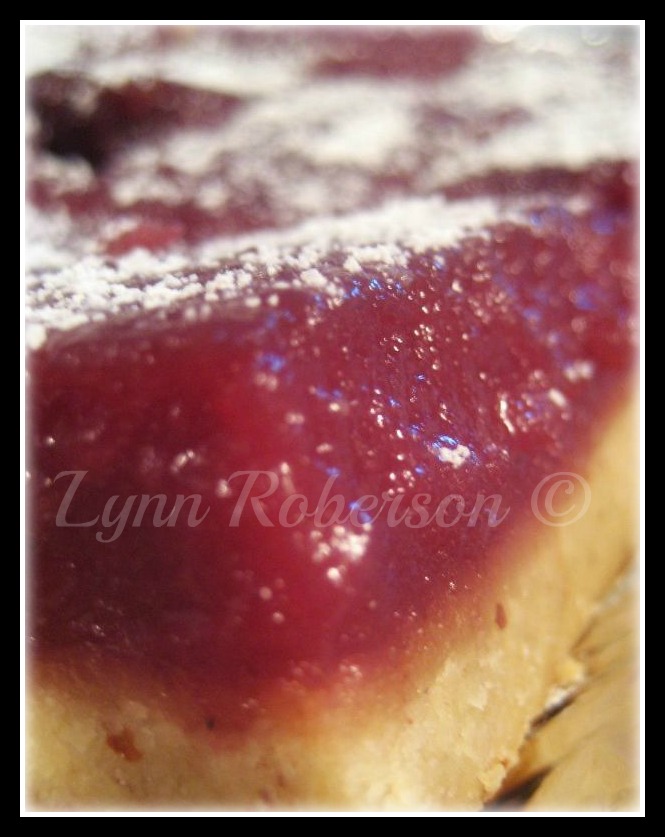
For this month's cookie carnival, it is Blackberry Almond Bars chosen by Kate. Actually, I never had shortbread bars before, and I didn't really prefer blackberry but after making these fruity bars, it changed my mind about it.. I like it.

To me, the part of making the shortbread was easy but not the part of making the blackberry curd, gosh, it was the hard part... I wasn't sure when the curd was ready, and I even broke the glass bowl while whisking the sugar and eggs on the double-boiler.. (it was funny.. haha). Well, in the end, the fruity bars turned out to be supper yummy as what Kate said! Thanks Kate. :)

BLACKBERRY ALMOND BARS (williams-sonoma)
Makes: 20 bars

INGREDIENTS:

For the shortbread:
* 12 Tbs. (1 1/2 sticks) chilled unsalted butter, cut into 1-inch pieces
* 2 cups all-purpose flour
* 1/2 cup ground toasted almonds
* 1/2 cup granulated sugar
* 1/2 tsp. salt

For the blackberry curd:
* 2 pints blackberries
* 4 eggs
* 1 1/2 cups granulated sugar
* Pinch of salt
* 1 Tbs. fresh lemon juice
* 4 Tbs. (1/2 stick) unsalted butter, at room temperature, cut into 1-inch pieces
Confectioners’ sugar for dusting

DIRECTIONS:
Preheat an oven to 350°F. Lightly butter a 9-by-13-by-2-inch cake pan. To make the shortbread, in the bowl of a food processor, combine the butter, flour, almonds, granulated sugar and salt and process until small lumps form. Sprinkle the mixture into the prepared pan and press evenly into the bottom. Bake until the shortbread is golden, about 20 minutes. Transfer the pan to a wire rack. Reduce the oven temperature to 325°F.

Meanwhile, make the blackberry curd: In a food processor or blender, puree the blackberries until smooth. Pass the puree through a chinois set over a bowl, using a pestle to press on the solids and extract as much juice as possible; discard the solids. You should have about 3/4 cup juice.

In the top pan of a double boiler or in a nonreactive saucepan, whisk together the eggs and granulated sugar until blended. Then whisk in the blackberry juice, salt and lemon juice. Set the top pan over but not touching simmering water in the bottom pan, or set the saucepan over medium-low heat. (If using a saucepan, take care not to heat the mixture too quickly.) Cook, stirring constantly with a wooden spatula or spoon, until the mixture is warmed through, 1 to 2 minutes.

Begin adding the butter a little at a time, stirring each addition until blended before adding more. Continue cooking, stirring constantly and scraping the bottom of the pan, until a finger drawn across the back of the spatula leaves a path, 8 to 10 minutes more. Immediately remove the pan from the heat. Pass the curd through the chinois set over a bowl and let stand for 10 minutes. Whisk to blend, then pour the curd over the shortbread, spreading it evenly to the edges.

Bake until the curd is set, about 30 minutes. Transfer the pan to a wire rack and let cool completely. Cut into individual bars, cover and refrigerate until ready to serve. Dust the bars with confectioners’ sugar before serving.

Tuesday, July 29, 2008

Giveaways


Giveaway..... Marye from Baking Delights is giving Coffee House Mysteries book. Check-out more information at Kettle and Cup "Celebrate with me" Giveaway!

Monday, July 28, 2008

Martha Mondays - The peach, apricot, and cherry pie

I know this is my food blog but I just wanna share about the movies we watched on Friday. We went to the drive-in movie, and watched Dark Knight and Hell Boy II. Dark Knight was a great movie and Hell Boy II was good but wasn't what I expected... Christian Bale did and excellent job as the Batman and Heath Ledger terrific as the Joker. I am also very impressed and proud of Mr Chin Han Ng from Singapore to be acting with such great talented actors and actress in the movie. Kudos to you!

 Well, its Martha Monday Challenge time. Choose either the peach, apricot, and cherry pie (p. 236) or the sour cherry cobbler (p. 279). So I chose peach, apricot, and cherry pie. It doesn't look as good as the one in the book but its yummy! I think I brush too much of the egg yolk and heavy cream on top of the Taking photos to me is a hard job! Still trying to snap some good photos... Anyway, check out Mimi on the move. Wonder which one is baked??? :)

It was very challenging because I never made a lattice top before. Should have followed the steps shown as the beginner but I just weave the lattice directly on the surface of the pie... A mistake but I managed to cover the breaks with some stars and crescents shapes on top of the lattice. hehe.. A dessert for me after a good turkey sandwich and a watermelon juice for lunch! :)

Friday, July 25, 2008

Masala Channa (chickpeas) and my disappointed prata

Gosh, I have been wanting for Indian food. I love to eat Indian food. It could be hot and spicy but I can take the mild ones... I even cooked Indian food (which I haven't post the recipes yet.. I know, I delay but please be patience. hehe) for the twins party last week.

In Singapore, we have a lot of Indian/Indian-Muslim restaurants/food stalls (we call it mama stalls) that are open for 24/7. There are two types of Indian restaurants/food stalls: Indian restaurants/food stalls that doesn't have meat in their menu - vegetarians, and Indian-Muslim restaurants/food stalls that have mutton and beef, like mutton briyani, beef steak and so on.. Sometimes at home, rather than cooking, I would go to the "mama stall" and take-away mee goreng or prata. I grew up eating Malay food but I also eat a lot of Indian food too. I list some of my favorites; masala dosai, briyani, baturas, prata, rojak, mee & bee hoon goreng, fish curry, gulab jamun (dessert) and many more (probably in the future, I'll post some of favorite foods in my blog).... Malay food and Indian food have one similarities, they use a lot of spices in their food but I guess in other types of cuisines too. (Listing down my favorites Indian foods, making me hungry.. hahaha.. )

For dinner last night, I made some Masala Channa (Chick peas/) and prata. Unfortunately, for not using the right ingredients and method, my prata were much of a disappointment. :( If you take a bite of these, you must have a very strong teeth to bite and chew it.. LOL... Somehow I just couldn't get it right when I made prata or any type of Indian bread.. hmmm must work on it harder.. hahaha..

Masala Channa is a typical Calcutta street food known as ghughni. The wholesome taste of chickpeas laced with spices and tamarind juice, are enjoyed with flat breads such as chapatis and pratas. Somehow, my betta half doesnt like to eat chickpeas (now I know) but I love it.


Recipe: Masala Channa ( from the book-The World's Greatest-ever Curries)
Serves :4


Ingredients:
225g/1-1/4 cups dried chickpeas (I used canned chickpeas)
50g/2oz tamarind juice
120ml/1/2 cups boiling water
45ml/3 tbsp vegetable oil
1/2 tsp cumin seeds
1 onion, finely chopped
2 garlic cloves, crushed
1 inch piece of root ginger, grated
1 fresh green chilli finely chopped
1 tsp ground cumin
1 tsp ground coriander (I used fresh coriander leaves, finely chopped)
1/4 tsp ground turmeric
1/2 tsp salt
225g/8oz tomatoes, chopped
1/2 tsp garam masala
chopped chillies and chopped onion, to garnish

Instructions:
1. Put the chickpeas in a large bowl and cover with plenty of cold water. Leave to soak overnight. (I omit this step because I used the canned chickpeas)

2. Drain the chickpeas and place in a large pan with double the volume of cold water. Bring to boil and boil vigorously for 10 minutes. Skim off any scum, then cover and simmer for 1-1/2 - 2 hrs or until soft. ( If you used canned chickpeas, place the content in medium saucepan and heat until simmering while stirring)

3. Meanwhile, break up the tamarind pulp and soak in the boiling water for 15 mins. Use the back of the spoon to rub the tamarind thru a sieve (strainer) into a bowl, discarding any stones or fibres. (Leave out this step if you are using commercial tamarind paste in the place of the fresh pulp.)

4. Heat the vegetable oil in a large pan and fry the cumin seeds for 2 mins until they begin to splutter. Add the chopped onion, garlic, ginger and chilli and fry for 5 mins.

5. Add the cumin, coriander, turmeric and salt and fry for 3-4 mins. Add the tomatoes and tamarind juice. Bring to boil and simmer for 5 mins.

6. Add the chickpeas and garam masala, cover and simmer for about 15 mins. Garnish with chillies and onion. (I didn't garnish with chillies and onions on my chickpeas)


Hmmm... How I wish there is a "mama stall" in this small town...... sigh..... ;)

Have a good weekends everyone. :)

Wednesday, July 23, 2008

Blog Award!

Farida at Farida's Azerbaijani Cookbook gave me the Arte y Pico award. Her blog is one of those blogs that I love to read. I didnt expect this coming at all since I am still new to this and do not have many post in my blog (more will come...) and also I am only an amateur.
This made my day. Im so happy and so honoured. Thanks Farida. :)


hmm.. I also want to give this award to the following bloggers which I love reading their blogs.

Jeena at Jeena's Kitchen.
Marye at Baking Delights.
Mimi at Mimi on the move.

Anyhoo, the award is in my display case for everyone to see.. :)

Thanks again Farida!

Saturday, July 19, 2008

Buttermilk Biscuits

This morning, I made some buttermilk biscuits for the first time. :) Well, almost everything here is a first time for me.. hehe... I was delighted that my biscuits turned out to be real good. I also tried dipping the biscuit in pesto-mayo sauce... hmmm.. yummy!! :)

What is the difference between biscuits and cookies? In America biscuits are defined as a savory, short, quick bread usually eaten for breakfast, and cookies are considered sweet little baked goods. In Singapore, they are the same thing - sweet baked goods.

Simple baked goods as written in Martha Stewart's baking handbook.

Recipe: Buttermilk biscuits (from Martha Stewart's Baking Handbook)
Ingredients4 cups all purpose flours, plus more for dusting
1 tbsp plus 1 tsp baking powder
1 tsp baking soda
1 tsp salt
1 tsp sugar
1 cup (2 sticks) unsalted butter, cold, cut into small pieces
1-3/4 cups buttermilk, plus more for brushing

Instructions
Preheat the oven to 375 degrees F. In a large bowl, whisk together flour, baking powder. baking soda, salt and sugar using a pastry blender, cut in the butter until the mixture resembles coarse crumbs with a few larger clumps remaining.

Pour in the buttermilk; using the rubber spatula, fold in buttermilk into the dough working in all directions and incorporating crumbs at the bottom of the bowl, until the dough comes together. The dough will be slightly sticky: DO NOT OVERMIX!


Turn out the dough onto a lightly floured work surface, With floured fingers, gently pat the dough into a round about 1-inch thick, pressing in any loose bits. Do not over-work the dough. Use a floured 2-1/4 inch round biscuit cutter to cut out the biscuits as close together as possible. (Use one cut edge as the edge for the next biscuits.)


Place the biscuits about 1-1/2 inches apart on an unlined baking sheet. Generously brush the tops of the biscuits with buttermilk.

Bake, rotating the sheet halfway through, until the biscuits are golden and flecked with brown sports, 18 to 20 minutes. Transfer to wire rack to cool.


Enjoy!

(edited note July 23,2008): these are called scones in Singapore too

Friday, July 18, 2008

First birthday cake!

It was the twins' birthday (July 17) and I have been thinking of baking a birthday cake for over a week. I had never make a birthday cake before. I never been to a decorating cake class. No training and no practice. I enjoy baking and I want to learn from my mistakes if it turned out to be bad!

When I looked at the cake books, I thought, "hey I can do that, its easy. Just bake the cake, add the filling, do crumb coating, smoothing the icing and decorate.. GOSH! It was not easy as I thought it would be, specially when you do not have the proper tools... I do not have a SPATULA here! LOL!! The only place in this small town is at Walmart but they sold out! For my first cake, I had to use the normal knife... :( I think the buttercream icing was a little too much on the cake! hehe.

The Well-decorated cake book also has helped me a lot thru the process of making my first cake... I duno what will happen to the cake if I do have that book in hand. ahahah.. I also cooked some Indian food, Chicken in Green Masala Sauce and Tricolor Pulao (photos taken not very good). I will post the recipe soon! Anyhoo, I'm so glad that everyone said my food and my cake were delicious! Glad that everyone enjoyed it as much as I did! :)

Custard curd-for the fillings

I used the yellow moist cake.

Crumb coating

The cake is almost done. In the center I used the cream cheese frosting to put happy birthday to Mick & Rick!

Inside of the cake.


The remaining crumbs, I decided to mix with some cream cheese frosting, shape it and decorated with some frosting..

So you see the photos, what do you think of the my first birthday cake! :)

Wednesday, July 16, 2008

Potato Chips Cookies

Cookies with potato chips??? A sweet and savory combined! The potato chips give a crunchy texture and these cookies can be given as a gift! It is quick, delicious and easy to prepare!

A while back, we went camping with some friends. I decided to bring the chocolate chips cookies and potato chips cookies. I wasn't sure if anyone would try the potato chip cookies. I was surprised and so pleased that they liked those cookies and by 2nd day of the camp, all cookies were gone!!! YAY! 

Recipe: Potato chips cookies
Makes about 3 dozen.


Ingredients:
1 cup butter
1/2 cup sugar
1 tsp vanilla
1/2 cups flour, sifted
1/2 cup coarsely crushed potato chips (I tend to add more potato chips)1/2 cups chopped pecans (optional)

Instructions:
1. Preheat oven to 350 degrees F (180 degrees C). Cream butter, sugar, vanilla until smooth and light.
3. Stir in flour until blended. Fold in potato chips and pecans.
4. Shape dough into balls and press gently. Place them on ungreased cookie sheet and bake for about 10 minutes or until light golden brown.
5. Transfer cookies to wire rack to cool completely. When cookies are cool, sprinkle with confectioners' sugar. Store in an airtight container.

Enjoy! :)

Monday, July 14, 2008

Martha Mondays - Pistachio Tartlets with Crème Fraiche and Berries

Today is the last day.... I wanted to bake it so much.... I found a great food blog, mimi on the move and she host food event; martha mondays, a bi-weekly bake. I wished that I have started baking it earlier. I only started two days ago. (hmm..a lesson to be learnt, half-way thru the process, I almost give up making it). This time, she selected Pistachio Tartlets with Crème Fraiche and Berries from Martha Stewart's Baking Handbook. I wanted to make it to challenge myself.....

The ingredients to make this recipe consist of pistachios and crème fraiche (originated from France) which is a thick and smooth soured cream with a rich and velvety texture.. It can only be found in specialty food stores or some grocery stores in US. But not in this town.... :/ I couldnt even find a fluted tart pan with removable bottom. Bummer!!! (...wished I was in Singapore.. I could get the things I needed at the baking-supply store near my place... hmm.. oh well!!!) Since I was unable to get crèam fraiche or fluted tart pan or flan rings, I have to find the way to make the crèam fraiche and other alternative to place the tart dough. I found the way to make homemade crème fraiche. YAY!!! It is easy but a really long wait to get it thickened! I was so nervous, that I forgot to snap a few pictures before the final outcome!!

Recipe: Crème Fraiche (from Stephanie Jaworski)

Ingredients:
1 cup heavy whipping cream
1 tbsp buttermilk

(Note:If possible, use pasteurized heavy whipping cream, as ultra pasteurized will take longer to thicken.)

Instructions:
In a medium saucepan over low heat, warm the cream to 105 degrees F (40 degrees C). Remove from heat and stir in the buttermilk. Use a large bowl to transfer the cream. Allow this mixture to stand in a warm place, loosely covered with plastic wrap, until thickened but still of pouring consistency. Stir and taste every 6-8 hours. This process takes anywhere from 24 to 36 hours, depending on your room temperature. It is ready when it is thick with a slightly nutty sour taste. Then chill cream in the refrigerator for several hours before using. Crème fraîche may be made and stored in the refrigerator for up to 10 days.


Recipe: Pistachio Tartlets with Crème Fraiche and Berries (from Martha Stewart's Baking Handbook, page 255)

You can make this recipe in a 14-by-4-inch rectangular tart pan with a removable bottom. Roll out the dough to a 16-by-6-inch rectangular before fitting it into the pan; bake with parchment and weights for fifteen mins, then revome parchment and weights and bake for 8 to 9 mins more.

Ingredients:
All purpose flour, for dusting
Pistachio Tart dough (see follows)
3/4 cup (abt 7 ounces) crème fraiche
1/2 cup heavy cream
3 tbsp confectioners' sugar
8 ounces fresh strawberries, hulled
6 ounces fresh raspberries
1/4 cup unsalted shelled pistachios

Instructions:
On a lightly floured work surface, roll out dough to 1/4-inch thickness. With a dry pastry brush, sweep off exess flour. With a 6-inch dessert plate as a guide, use a sharp knife to cut out eight rounds, rerolling scraps as necessary. Fit dough rounds into eight 4-inch flan rings, pressing into the edges. Chill for 10 minutes. Using a sharp knife paring knife, trim dough flush with the top edge of each ring. Refrigerate the tarlet shells until well chilled, about 30 mins.

Preheat the oven to 375 degrees F. Line shells with parchment, leaving a 1-inch overhang. Fill with pie weights. Bake until edges are just beginning to turn light golden, about 15 mins. Remove parchment and weights; continue baking until surface is light golden all over, about 6 mins. Transfer to a wire rack to cool completely. After 10 minutes, remove tarlets from the rings.

In the bowl of an electirc mixer fitted with whisk attachment, combine crème fraiche, cream and sugar (this is the part where I get all the dots on my apron and on the table..lol..). Whisk until soft peaks form (my cream turned out to be slightly light yellowish color... hmmm...). Using an offset spatula, spread mixture into cooled tartlet shells. Arrange berries (I used the mixed frozen berries which I should hv gotten individual fresh berries) and pistachios on top. Serve immediately.

(Note: For the weights, you can use dried beans or rice bundled in cheesecloth and secured with twine - that is what I did)

Recipe: Pistachio Tart Dough (from Martha Stewart's Baking Handbook)
MAKES ENUF FOR EIGHT 4-INCH TARTLETS OR ONE 14-BY-4-INCH TART

Ingredients:
1-1/2 sticks(3/4 cup) unsalted butter, room temperature
1/2 cup confectioners' sugar
2 large egg yolks
1-1/4 cups all-purpose flour
1/2 cup unsalted shelled pistachios, finely ground
2 tsp heavy cream

Instructions:
In the bowl of an electric mixer fitted with the paddle attachment, mix butter and confectioners' sugar on a low speed until combined, about 2 mins. Add egg yolks and mix until incorporated, about 1 min, scrapiung down the sides of the bowl as needed. Add 1 cup flour and mix on low speed until just incorporated, about 30 sec. Add remaining 1/4 cup flour, pistachios, salt and cream, mix until flour is no longer visable, about 1 min. Wrap tighly using plastic wrap and refrigerate for 1 hr or overnight.


The final outcome, this tart is rich and yummy!!! YAY!!!!! I also would like to thank mimi for hosting this food event. Thank you :)

Sunday, July 13, 2008

Homemade Pesto Sauce


When comes to sauces (basicly food in general), I always prefer to make homemade instead of getting from the grocery store. All-homemade is fresher than the ones in the stores. Although sometimes, it is cheaper to just get it from the store. (I always think if they sell it in the grocery store, i can cook/make it)..

In my previous blog, I used the basil leaves for my tomato sauce. Well this morning, I decided to use all of the leaves (now my plant is almost leafless). I have learned that fresh basil is very delicate. It will turn brown if it gets very hot or if it's exposed to air for long periods of time. So before the leaves are wasted, I should do something with it. Pesto sauce!

Pesto sauce originates in the city of Genoa in the Liguria region of northern Italy, where people have been making it for so many years with the green basil that grows wild on the hillsides. It is commonly used in pasta. You can also mix it with mayonnaise as a dip, on pizza in place of the tomato sauce or mix with cream cheese for your bagel. When you mix pesto with pasta, potatoes or even risotto, it is to be stirred in at the last minute just before serving. It is very important never to cook pesto because when basil is heated, it gets bitter.

Store pesto in a jar or airtight container in the refrigerator for about a week, in the freezer for about six months. To keep it looking fresh and green, cover the top with a thin layer of olive oil or with a sheet of plastic wrap directly on its surface; this will keep it from oxidizing and turning brown. If your pesto darkens in color, it will still taste good. Discard it if it has been stored improperly. One way to freeze pesto, is in ice cube tray then transfer the cubes to a heavy duty plastic freezer bag (the ice cube tray may discolor and flavored, so reserve the ice cube tray just for this purpose). Thaw frozen pesto in the refrigerator or in the microwave on medium power just until room temperature.

Recipe: Pesto sauce

Ingredients:
2 cups fresh basil leaves
1 small clove garlic, peeled
1/4 cup pine nuts
2/3 grated Parmesan cheese
1/2 cup extra-virgin olive oil
salt and pepper to taste

Instructions:
1. Combine basil, garlic, pine nuts and Parmesan cheese(i tend to add a little more parmesan cheese in mine) in a food processer.

2. Pulse on/off 6 times to coarsely chop the ingredients. Trickle in olive oil with the blender running until the basil mixture is a puree

3. Remove pesto from blender container. Stir in pepper and salt to taste.

(recipe from Try-Foods International)

Friday, July 11, 2008

Cinnamon


Cinnamon bark or cinnamon powder... It is used in cookery as a condiment and flavoring material, being largely used in the preparation of many food, desserts including drinks around the world.
Its hot today and I do not want to spend too much time in the kitchen. I decided to make some really tasty cinnamon swirl biscuits for a snack. I got this recipe from sweet Jenna's kitchen. ! Its not only tasty, its crunchy with a little soft centre. It is also so simple to make it and doesnt take too much of your time. A great snack! Go ahead and try it! its so yummy!


Ingredients
3 Tortilla Wraps
1 tsp Cinnamon Powder
4 Heaped tsp Low Fat Margarine
2 Tbsp Soft Brown Sugar

Instructions
In a small bowl mix together you sugar, margarine and cinnamon powder. Place your tortillas onto a flat plate. With the back of a spoon spread the cinnamon butter mixture onto the tortillas one by one. Save approx 1 tsp of the mixture for later. Spread the mixture to all the edges of the tortilla.


How to roll the tortillas..
Take the folded part of the tortilla and fold it in half again, this gives it a round shape when you roll it up instead of a flat shape. Roll up the tortilla - repeat this process with all 3 of your tortillas.

Take the balance of the cinnamon butter mixture and spread it all around the tortillas, this includes underneath the tortillas. Use a sharp knife to cut the tortillas diagonally. The cinnamon butter may drip out but not too worry about it.

Place the cinnamon swirl biscuits onto a baking tray, you do not need to grease the tray as you have already spread butter all around the cinnamon biscuits and bake at 350F for 7 minutes. Take the tray of cinnamon biscuits out of the oven and turn the oven tray around for the biscuits to cook evenly. Return to the oven for another 5-7 minutes.
Once baked, leave the cinnamon swirl biscuits to cool on the tray then dust with powdered sugar.

Check out her website for the step by step process of making this tasty cinnamon swirl rolls! Thanks Jeena for the great recipe! :)

Italian Cooking

Thought of Italian cooking today... I was contemplating whether to have cream sauce or tomato sauce for my angel hair pasta. Finally I made some really saucy and delicious tomato sauce and add my favorites to it. I have some fresh basil leaves that we got from Publix and I tot of making a good use of it... I could have made some garlic bread but unfortunately we were out of bread. So we just had angel hair pasta with tomato sauce. hmmm.. delicious! The sauce may be refrigerated for up to one week or frozen for up to 6 months. I'm already thinking of having ricotta cheese ravioli with the leftover sauce... hmmm a good idea! hehe.... :)


Recipe:
1 pound lean ground beef
1 tbsp minced garlic
1 onions, chopped
1 (8 ounce) can sliced mushrooms
1 green bell pepper, sliced thinly
1 cup black olives, chopped coarsely
1 (15 ounce) can tomato sauce
2 (14.5 ounce) cans diced tomatoes
2 (6 ounce) cans tomato paste
1 tbsp dried thyme
1 1/2 tbsp dried oregano
1 1/2 tsp dried basil ( I used fresh basil about 1 tbsp, minced)
1 tsp ground black pepper
1 tbsp white sugar
1 cup water
2 tbsp extra-virgin olive oil
salt and black pepper to taste

Saute onion and garlic in the olive oil over medium heat until translucent, but not brown and stir in ground beef. Cook until beef is no longer pink. Drain into a large colander to drain grease.

To a large saucepot, add tomato sauce, tomatoes, tomato paste, mushrooms, green bell pepper, black olives, sugar, water and stir well. Pour the meat mixture into the pot. Lastly season with thyme, oregano, basil, salt and pepper to taste. Bring to a boil, lower the heat to just bubbling, stirring occasionally for 30 minutes.

Serve immediately over cooked angel hair pasta or other Italian pasta and top with parmesan cheese. :)

Wednesday, July 09, 2008

Martha Stewart's Baking Handbook

I just love Martha's Baking Handbook. I borrowed it from the public library here. I would normally borrowed recipe books from the library becoz I do not have all my recipes book in US (all of them are still in SG). Seeing the photos is so irresistable making my saliva dripping down (almost.. haha..) each time I opened the pages. I always like recipes books comes with photos to guide me thru the process. I cant wait to try all the recipes in there... hehe... I think those who enjoys baking would love this book as much as I am. Its A MUST have!!

Tuesday, July 08, 2008

Newest blogger in the block!

hmm... Im not new to blogging but new in blogger.com. Today, I decided to create a new blog, I guess a food blog so that my family and frens would be able to see what's cooking in my kitchen. I enjoy cooking and baking. I also enjoy reading other bloggers sites about food and desserts. Besides my mom, grandma and my aunt who inspires me to cook and bake, the bloggers inspired me too... to be better in my cooking and baking skills. Anyhoo, Im just here to share my cooking recipes with others. :)
Related Posts Plugin for WordPress, Blogger...