Showing posts with label Desserts. Show all posts

Saturday, February 04, 2012

HERSHEY'S Ultimate Chocolate Brownies

I asked hubby if he wants chocolate chip cookies or brownies. He said brownies with a big grin on his face! I was looking for the recipe in my favorite recipe book and guess what! I didn't have any brownies recipes at all. I thought I might just make chocolate chips cookies but when I looked at the HERSHEY'S semi-sweet chocolate chips packet, there's a recipe for brownies. Yay! (I didn't even think about it at first) 


The brownies turned out great, not dry. I did a little change. Instead of using 2 cups of white sugar, I used 1 cup of white sugar and 1 cup of brown sugar. For the frosting; in the middle of mixing, I did not have enough powdered sugar. So I took some of the white sugar and blend in my small blender. I thought I had it good but not good enough.. When I mixed those sugar with my not-done-yet frosting, it didn't turned out so smooth, a little grainy.  Well, we enjoyed the brownies and the smell lingering within the apartment. Yum-Yum!! :)

Ingredients:
3/4 cup HERSHEY'S cocoa powder
1/2 tsp baking soda
2/3 cup butter, melted and divided
1/2 cup boiling water
1 cup white sugar
1 cup brown sugar
2 eggs
1-1/3 cups all-purpose flour
1 tsp vanilla extract
1/4 tsp salt
1 cup HERSHEY'S semi-Sweet Chocolate Chips
One-bowl Buttercream Frosting

Heat oven to 350 degrees F. Grease 13 x 9 x 2-inch baking pan.
Sift together cocoa and baking soda in a large bowl, stir in 1/3 cup butter. Add boiling water, stir until mixture thickens. Stir in sugar, eggs (make sure to stir quickly when adding the egg) and remaining butter. Stir until smooth. Add the flour, vanilla and salt; blend completely. Stir in chocolate chips and pour into prepared pan. 
Bake 35 to 40 minutes or until brownies begin to pull away from the sides of the pan. Cool completely in the pan on a rack. Frost with One-bowl Buttercream Frosting. Cut into squares. Makes about 36 brownies.

One-bowl Buttercream Frosting
6 tbsp butter
softened 2-2/3 cups powdered sugar
1/2 cup HERSHEY'S cocoa powder **
1/3 cup milk
1 tsp vanilla extract

Beat butter in a medium bowl. Add powdered sugar and cocoa alternately with milk, beating to spreading consistency (additional milk may be needed). Stir in vanilla. About 2 cups frosting. 
** I did not add the cocoa powder in my frosting.

Wednesday, November 16, 2011

Chocolate Glaze I


The photo on the right is a chocolate cake. Do you think it is from the box or I had made it from scratch? .....What do you think? If you guess from scratch, well I'm sorry, wrong answer. It is from the box. The cake was soft, moist and delicious. My hubby enjoyed the cake too and he was wondering what else did I put in the cake. hmm.. I've added extra ingredients to make it yummier... chocolate chips and maraschino cherries. To finish it off, topped with chocolate glaze. Yum-Yum!!!

My recipe for today is the chocolate glaze. I found the recipe from Allrecipes.comIt is super quick, easy and fast. The chocolate glaze is delicious but it was not enough so I had to double the recipe for my cake. And even though it is cold today but I just can't help it.. gotta have a slice of the cake with my Blue Bell Ice-Cream (Cookies & Cream). :)

Ingredients:
1/2 cup semisweet chocolate chips
2 tbsp butter
1 tbsp corn syrup

In a double boiler, melt together butter, chocolate and syrup. Alternatively, you can melt the chocolate in the microwave and then blend in the other ingredients. Pour glaze while still warm over cake. 

Tuesday, October 11, 2011

Croissant and chocolate bread pudding


  • Bread and butter pudding is one of Britain's oldest traditional family desserts. This is one of our favorite dessert too because it is delicious and simple to make. Making bread pudding is also a good way to use up day-old bread. 

  • I've used croissants instead of white bread for yesterday's bread pudding. It is a wonderfully take on the classic. Croissants is also easy to get in many groceries store. Here is the recipe that I used to make my croissant and chocolate bread pudding. :)


  • Ingredients: 
  • Unsalted butter for the baking dish
  • 6 large egg yolks
  • 2 cups milk
  • 1 cup heavy cream
  • 1 cup granulated sugar
  • 1 teaspoon pure vanilla extract
  • 1/2 teaspoon kosher salt
  • 1/2 teaspoon ground nutmeg
  • croissants, cut into 1-inch pieces (about 1 pound)
  • 4 ounces bittersweet chocolate, cut into chunks, (I used mini chocolate chips)

  • Heat oven to 375° F. Butter an 8-inch square or other shallow 2-quart baking dish.
  • In a large bowl, whisk together the egg yolks, milk, cream, sugar, vanilla, salt, and nutmeg. Add the croissants and chocolate and mix to combine.
  • Transfer the mixture to the prepared baking dish and bake until set and a knife inserted in the center comes out clean, 30 to 40 minutes. Serve warm or at room temperature.

Thursday, February 17, 2011

Red Velvet Cupcakes

The last two days, I was a little busy trying to revamp my blog.. Now, I'm very happy with the new design but still have a few things I need to finish up.  Well, what do you think??? hehe.. :)

When I visited other bloggers' websites, I was wondering how they do this and that in their blog. For hours, I was searching for Help. I saw the answers but I have to edit in the html editor. To tell you the truth, I am clueless about designing web page using html editor. It's just too confusing. However, I decided to give it a try. I followed as instructed, but in the end, it was all wrong.. It was a little frustrating but at the same time I think it was funny. I thought I could do it.. Not!!! ha..ha.. After all that, I realized I can do without editing from the html editor. *wink* 

Anyway, here is what I baked for hubby on Valentine's Day. Red Velvet cupcakes. Bright red with chocolate flavor, topped with cream cheese frosting and sprinkles. They taste even better the next day. 


Red Velvet Cupcakes
Makes 12 Cupcakes
Ingredients:
1 1/4 cups sifted cake flour
1/4 tsp salt
1 tbsp regular or Dutch-proceed cocoa powder
1/4 unsalted butter, room temperature
3/4 cups granulated white sugar
1 large egg
1/2 tsp pure vanilla extract
1/2 cup buttermilk
1 tbsp liquid red food coloring
1/2 tsp white distilled vinegar
1/2 tsp baking soda

Preheat oven to 350 degrees F and line 12 muffin tin with paper cupcake liners.
In a large bowl, sift together flour, salt and cocoa powder.
In the bowl of your electric mixer, or with hand mixer, beat the butter until soft (abt 1-2 minutes). Add sugar and beat until light and fluffy (abt 2-3 minutes). Add the egg and beat until incorporated. Scrape down the sides of the bowl. Add vanilla extract and beat until combined.
In a measuring cup, whisk the buttermilk with the red food coloring. With the mixer on low speed, alternately add the flour mixture and buttermilk to the butter mixture, in 3 additions, beginning and ending with the flour.
In a small cup combine the vinegar and baking soda. Allow the mixture to fizz and then quickly fold into the cake batter.
Working quickly, divide the batter evenly among the 12 muffin cups and smooth the tops with an offset spatula or the back of a spoon. Bake in the preheated oven for approximately 18-23 minutes, or until a toothpick inserted in the center of the cupcakes comes out clean. Cool the cakes in their pans on a wire rack for 10 minutes and then remove from the pan. Let cool completely before frosting.
Cream Cheese Frosting
Ingredients:
4 ounces cream cheese, room temperature
1/4 pure vanilla extract
1/4 cup confectioners' sugar
1/3 cup cold heavy whipping cream

In a bowl of your electric mixer, or with a hand mixer, beat the cream cheese until smooth. Add the vanilla and confectioners' sugar and beat until smooth. Using the whisk attachment, gradually add the heavy cream and whop until the frosting is thick enough to pipe. Add more sugar or cream as needed to get the right consistency.
Spread the frosting with a knife or offset spatula or use a large 1M Wilton open star decorating tip to pipe the frosting.

Notes:
If you are unable to get buttermilk, you can make your own buttermilk by adding 1 tablespoon of white distilled vinegar, cider vinegar, or lemon juice to 1 cup of milk. Let this mixture stand 5 to 10 minutes before using.


Source: Joy of Baking


Red velvet cupcakes and card (red) for hubby.

Box of chocolate, lovely card and rose for yours truly. 


Thursday, February 03, 2011

Bubur Pulut Hitam (black glutinous rice dessert)


This was our dessert last night and it's hubby first bubur pulut hitam. After he finished his bowl, he said its good but not his favorite. :( I was disappointed but its OK because this is my favorite dessert. I just think he is not use to eat this dessert.. oh well, I can have it all to myself. LoL!!! There are many variations to make bubur pulut hitam; some added the coconut milk when the black glutinous rice becomes thick. After so many reviews, I prefer to have the coconut milk as a topping and my bubur is not too watery. :)

Ingredients:
1 cup of black glutinous rice
1 pandan leaf
sugar to taste
water
coconut milk

Rinse the black glutinous rice with water thoroughly until the water turns clear. Fill half of the pot with water. Add pandan leaf and bring it to boil. Reduce the heat and add the black glutinous rice into the pot, cover. Cook for 45-60 minutes or until the rice becomes soft and breaks up. Remember to keep checking the water level, add more water if it become too dry. Add sugar to taste. Then simmer for a few more minutes while constantly stirring until the mixture becomes thick. 
To serve, pour into a bowl and a few tablespoon of coconut milk as topping. You may add an extra amount of topping if you prefer creamier ones. :)


Notes:
  • Put a porcelain spoon into the pot while cooking so that the rice are cooked faster. 
  • You can use brown sugar or white granulate sugar if you do not have gula melaka (palm sugar).
  • Leftover bubur pulut hitam, store it in a tight-sealed container and keep in the refrigerator.

Thursday, December 02, 2010

Individual Orange and Chocolate Cheesecakes

After watching Giada's video on Food Network, I just had to try these individual orange and chocolate cheesecake. My first try-out, I followed the exact recipe. They turned out great but I just think there was a little too much butter for the crust. Then this is my second time. They are still delicious even after I made some changes. I used ginger snap cookies instead of the chocolate wafers and put little chocolate chips cookies in the middle of the cheesecake. So it will still be called individual orange and chocolate cheesecake. hehe..  :)

In her video, she used the mini muffin tin. I used my silicone standard muffin pan. I wished I have my mini muffin tins here but they are still in Singapore. After the cheesecake is cooled, I had no problem when removing the cheesecake from the pan. I think maybe the secret to getting these out with a "pop" is using a silicone (mini) muffin pan. hehe.. 

These little cheesecake is super easy to make and I'm sure it will be a hit at any party. :))

Individual Orange and Chocolate Cheesecake, 
adapted from Giada De Laurentiis's recipe at Food Network
Ingredients:
6 rounds ginger snap cookies, finely crushed to about 1/3 cup
1 tbsp butter, melted
1/4 cup ricotta cheese
2 ounces cream cheese
1/4 cup sugar plus 1 tbsp sugar
1 orange, zested
1 egg
some chocolate chips
hot water

Preheat oven at 350 degrees F. Lightly spray the muffin tin with Baking Joy.

Combine the crushed cookies and melted butter. Place a tightly packed teaspoon of the mixture into each muffin cup. Press down firmly using the back of a shooter glass. Bake for 4 minutes. Remove and let it cool.

In a food processor, combine the ricotta cheese, cream cheese, sugar, half of the orange zest, and the egg. Blend until smooth. Fill some chocolate chips in the middle of the crust. Then fill the cups with cheesecake mixture. Place the muffin tin in a baking dish and pour enough hot water in the baking dish. Bake for 30 minutes. 

Transfer the muffin tin to a wire rack and let cool for 30 minutes. Refrigerate for 15-20 minutes use a small knife to gently pop the cheesecakes out of the cups. Combine the rest of the orange zest and 1 tbsp of sugar and use the mixture for the topping. 


Notes:
  • Water-bath is a must when baking. This will ensure that the cheesecake bake all the way and don't turn out mushy.

Thursday, November 25, 2010

Gina's Pumpkin Cheesecake - Thanksgiving Dessert

Happy Thanksgiving everyone!!! For the next few days, I am posting about some of Thanksgiving dishes. To begin my first post, it will be on Dessert. I baked my first pumpkin cheesecake. At first, I was a little skeptical with the amount of cream cheese used for this recipe. I thought it would be heavy but not at all. The gingersnap cookies really goes well with pumpkin and the cinnamon whipped cream topping, that, is really a great touch!! Great recipe!

Thanks Gina for this fabulous recipe.  :)


Gina's Pumpkin Cheesecake, Food Network


Ingredients:
Crust:
30-35 squares gingersnap cookies
6 tbsp (3/4 stick) unsalted butter, melted

Preheat the oven to 350 degrees F.
Add the gingersnaps to the bowl of a food processor, and pulse until crumbly. Transfer to a large bowl and add the melted butter. Stir until evenly mixed. Press the mixture into the bottom of a 9-inch spring-form pan with 3-inch sides. Bake the crust until golden brown, about 10 minutes. Remove from the oven and let cool completely while preparing the filling.
Fillings:
4 (8-ounce) packages cream cheese, room temperature
1 3/4 cups sugar
1 (15-ounce) can puree pumpkin (not pumpkin mix)
5 large eggs
1/2 tsp ground ginger
1/4 tsp freshly grated nutmeg
1/4 ground cloves
1/2 tsp table salt
1 tbsp vanilla extract
2 tbsp all-purpose flour

Put a teakettle filled with water on the stove top, over medium heat, and bring to a boil.
In a large mixing bowl, add the cream cheese and sugar and beat with an electric mixer at a low speed until light and fluffy, about 2 to 3 minutes. Add the pumpkin and beat until incorporated. Beat in the eggs, one at a time, then add cinnamon, ginger, nutmeg, cloves, salt and vanilla, and beat until blended. Add flour and beat until incorporated.
Wrap the sides and bottom of the 9-inch spring-form pan with heavy-duty aluminum foil. Pour filling into the pan and put it in a small roasting pan. Pour the hot water from the teakettle into the roasting pan, filling halfway up the sides of the spring-form pan, about 1 1/2 inches. Bake at preheated oven at 350 degrees F until the center of the cheesecake moves slightly when the pan is gently shaken, about 1 hour and 20 minutes. Remove the cake from the water bath and let it cool on a wire rack. Once cooled, use a paring knife to loosen the sides of the cake from the pan. Chill the cheesecake for at least 4 hours before serving. Serve with Cinnamon Whipped Cream.

Cinnamon Whipped Cream
Ingredients:
1 cup heavy cream, chilled
1/4 cup confectioners' sugar
1 tsp vanilla extract
1 tsp ground cinnamon

Pour the heavy cream into a large bowl and beat with an electric hand mixer until thick and frothy. Add the confectioners' sugar, vanilla and cinnamon, and beat until medium peaks form.
 Still cooling in the pan


after being chilled in the refrigerator overnight.


Spread cinnamon whipped topping.
(i also topped with grated semi-sweet chocolate)

Notes:
Avoid over-beating the batter. Over-beating incorporated additional air and tends to cause cracking on the surface of the cheesecake.

Wednesday, November 17, 2010

Honey Cornflakes Mini Cups ~ Eid-ul Adha

This year raya haji was confusing for me. I thought Eid-ul Adha is on 17th but after chatting with my friend, she said its the 16th here. I have plans to cook some raya dishes but since its a last minute, I whipped up a simple dish yesterday. At first, I thought I would cook the raya food today but after much considerations... hehe.. we are going to have a little different from having the tradition raya food. Will post it soon on that.

This morning, I'm sharing the super easiest Eid cookies that I baked last minute. They are crunchy, yummy and uses little ingredients. Honey Cornflakes mini cups.. You can add raisins, toasted groundnuts, toasted almond slices or just have it plain cornflakes. You can even get your little kids to help out and have fun. Definitely both the kids and the adults will enjoy these Eid cookies. :))

Ingredients:
50g butter
1 tbsp honey
2 tbsp brown sugar
3 cups cornflakes
1/2 cup raisins

Preheat oven at 325 Degrees Fahrenheit. 
In a small saucepan, melt butter, honey and brown sugar over low heat. 
Keep stirring until the sugar dissolved. 
Turn off heat and mix cornflakes and raisins. Mix well.
Fill the mixture into the mini cups. Sprinkles some nonpareils decors on top. (I also sprinkles a little of the fine crushed chocolate sandwich cookies and red sugar decors, they look just fine after baking.)
Bake for 5-10 minutes.
Cool completely before storing in an air tight container.


Happy Eid-ul Adha to each and everyone celebrating. :)

Wednesday, August 25, 2010

Bubur merah, bubur putih


This dessert is not unusual with Malay families in Singapore. Usually served at birthday parties or at a thanksgiving feast. My mom would make this dessert using the red color sugar but since I am unable to get any red color sugar here, I used the brown sugar. Many used the glutinous rice but others would use regular rice. The brown/red part is usually sweet and the white part is a little salty. My first time to make this delicious dessert. Wonderful.

Ingredients:
1 cup glutinous rice, washed
2 pandan leaves (screwpines), knotted
water
1/2 cup coconut milk (used 1 cup regular 2%milk)
salt to taste
brown sugar or gula melaka
sugar

In a pot, cover glutinous rice with enough water and milk. Add the pandan leaves and salt to taste. Let it boil under a medium heat. Stir often to avoid the rice from sticking on the bottom of the pot. Once the rice has soften, from 1/3 of the amount of rice. Set it aside. The remaining 2/3, add the brown sugar and stir well. Add the white sugar is not sweet enough.
To serve,  scoop the brown glutinous rice first then drop a tablespoon of the white glutinous rice. Enjoy!

Wednesday, July 28, 2010

New York Cheesecake

This New York Cheesecake recipe is from Kitchen Queen in Allrecipes. I was very happy how my New York Cheesecake turned out. It was fast and easy to make. I wanted to baked in the water bath  but some how I only remember after I put it in the oven.. hahah... ohh well.. it still does turned out very good!!! There was no crack on top and turned out very smooth. Both of us really like it. Yum-Yum :)

Here are some changes I made to the recipe: Instead of using graham crackers crumbs, I used cornflakes crumbs/sugar/butter as the base. I was out of sour cream, so I used blueberry pie filling & topping and whipped cream instead.

Ingredients:
1 1/2 cups graham crackers crumbs
1/4 cup white sugar
1/3 cup butter, melted

3 (8 ounce) packages cream cheese, room temperature
4 eggs, room temperature
1 tablespoon vanilla extract
1 cup white sugar
1 tsp cream of tartar

Top layer
1 pint sour cream
1 tsp vanilla extract
1/2 cup white sugar

Preheat oven to 350 degrees F (175 degrees C)
Mix together the cracker crumbs, sugar, and butter in a bowl until evenly moistened. Press into the bottom and 1/2 inch up the sides of a 9-inch springform pan.
In a large bowl, mix together the cream cheese and sugar with an electric mixer until smooth. Blend in the eggs, 1 tbsp of vanilla, and cream of tartar. Pour over the pie crust.
Bake in preheated oven until the center is set, about 50 minutes, Allow to cool on the counter for 5 mins.
Mix together the sour cream, 1 tsp vanilla, and 1/2 cup sugar in a bowl until smooth; carefully pour over cheesecake starting from the sides of the pan and working your way to the center.
Return to oven for another 5 minutes. Allow to cool in pan to room temperature. Refrigerate for at least 6 hours before serving.


Notes:
  • Professional pastry chefs bake cheesecakes in a water bath. This method bakes the cake very gently so that it does not darken, curdle, or crack. A springform pan is the best choice for baking cheesecakes because you can remove the cake from the pan easily.
  • To prevent water from seeping into the removable bottom of the springform pan, wrap aluminum foil completely around the bottom and halfway up the sides of the pan. Place the cheesecake into a jellyroll pan (or any baking pan with sides) and place the pans into the oven. Use a teakettle to fill the outer pan with hot water. Cheesecakes usually bake for about 1½ hours, so check the bath after the first hour and refill if necessary.
  • Because cheesecake is very soft, it can be difficult to judge when it is done cooking. Turn off the oven and leave the cheesecake in it for an additional hour to ensure that it sets completely.
  • For a seamless look, you can smooth the sides of the cheesecake with a hot, wet knife.

Saturday, May 29, 2010

Strawberry Panna Cotta

Panna Cotta is an Italian dessert made by simmering together cream, milk and sugar, mixing this with gelatin, and letting it cool until set. 'Panna Cotta' literally means 'cooked cream.' This is my sister's favorite dessert.  I did not realized how easy it is to make them when I looked at the recipe. I felt bad because I never make any for her. :-( 

At first I was thinking to make a plain Panna Cotta, but in the end, I decided to work with strawberries. I followed the recipe from Women's Day but a little different. I used agar-agar strands instead of the powder (it is much  faster to use the powder) and 2% milk instead of whole milk. The remaining puree, I did not throw away the seeds.

Ingredients
    1 lb strawberries, hulled 
    1⁄2 cup plus 1 Tbsp sugar 
    1⁄2 tsp vanilla extract 
    1 packet unflavored gelatin 
    1⁄4 cup water 
    11⁄2 cups whole milk 
    1 cup heavy whipping cream 

    Garnish (optional):
    sliced strawberries
    mint leaves

    Lightly grease eight 4-oz ramekins or cups with nonstick cooking spray.

    Purée strawberries and sugar in a blender until very smooth. Press through a sieve into a bowl; discard seeds. Stir in vanilla. Remove 1 cup for the panna cotta; reserve remaining purée.

    Sprinkle gelatin over 1⁄4 cup water in a small custard cup; let stand 5 minutes to soften. Place cup in a small skillet of simmering water; stir until gelatin is dissolved. Simmer milk in saucepan. Remove from heat; stir in dissolved gelatin. Transfer to a 1-qt glass measure; stir in reserved 1 cup strawberry purée and the cream until well blended. Pour into ramekins. Chill, covered, until firm, about 4 hours or up to 2 days.

    To unmold, run a small knife around each; invert onto plates, gently shaking to remove. Spoon some of the reserved strawberry sauce onto panna cotta.


    Don't worry my baby sis, I ate some just for you! *wink* xxx

    Wednesday, May 26, 2010

    Agar-Agar Gula Melaka (Palm Sugar Jelly)

    I realised I have two packets of agar-agar strands sitting in my pantry for a long time. So that day, I decided to use one packet to make some agar-agar (jelly/jello).. Perfect for hot weather!!!!!

    What is agar-agar? 
    The word "agar" comes from the Malay word agar-agar (meaning jelly). It is a natural vegetable gelatin counterpart, sold in packages as washed and dried strips or in powdered form. It is used to make jellies, puddings and custards.

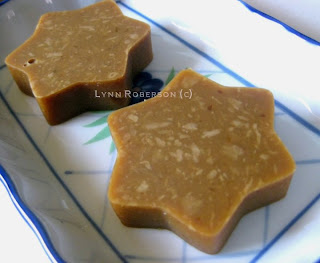
    My very first Agar-Agar Gula Melaka (Palm Sugar Jelly). It is also known as Agar-Agar Gudir as informed by my girl friends in Facebook. This beautiful dessert is another famous dessert among the Malay community. My mum would make this dessert for any special occasions. 

    The sweetness come from the gula melaka (palm sugar) and the rich flavor from the coconut milk. Some recipes called for egg whites. For this recipe, I did not add any egg whites.  When the agar-agar is cooled, the coconut milk layer should rise up giving it a two layer effect. This is my first attempt and  it did not show the two layer effect :-(... but it is still good, I just can't help to keep eating them. hehe... :-)


    Ingredients:
    15gm agar agar strands
    200gm gula melaka
    1 screwpine leaf (knotted)
    500ml water

    Mix together
    200ml coconut milk
    50ml fresh milk

    Soak agar-agar strands in cold water for at least 1 hour. Drain and cut into small pieces. In a heat proof bowl, combine agar-agar, palm sugar, screwpine leaf and water. Stirring constantly. Bring to a boil and let it simmer until the palm sugar dissolves. Sieve the mixture and return back to heat. Discard the screwpine leaf. Make sure the syrup is half from its original amount before adding the milk mixture.
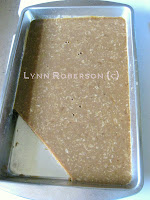
    Once the milk mixture is added, leave to simmer for about 3 to 4 minutes before pouring into moulds or a cake pan. (I used a 13" x 9" x 2" rectangular pan.) Leave to cool in room temperature for about 20mins. Then chill in the fridge for about 2 hours. Once the agar-agar is set, it is ready to be served.


    Notes:
    You can replace the gula melaka (palm sugar) with brown sugar, but the taste might differ. When using gula melaka, then try not to add sugar or brown sugar as the sweetness to this dessert should come fully from the gula melaka that you have used.

    Friday, May 07, 2010

    Strawberry tart

    Finally I made my strawberry tart. It may not be the best looking strawberry tart but the taste was super delicious! Reminds me of Delifrance's fruit tart in Singapore. The sweet pastry crust was fantastic. Next time, I am making this again and use melted chocolate over the base..

    If time does not permit to bake one, buy one at the supermarket. Once the pastry shell has been baked and cooled, it is a good idea to seal the crust by spreading a thin layer of apricot glaze or melted chocolate over its base to prevent the crust from getting soggy. There different types of fillings you can use, like Lemon curd or cream cheese filling. For this one, I use the traditional pastry cream.I didnt have any fluted tart pan so I used Pyrex's 8" pie dish. 

    Strawberry Tart 
    (adapted from Summer Berry Tart, Desserts & After Dinner Treats Step-by-Step book)

    Ingredients:
    1 cup plain flour
    90g butter
    2 tbsp icing sugar
    1-2 tbsp water 

    To make crust: Preheat oven to moderate 180C/350F. Process flour, butter and icing sugar in food processor, using pulse action, for 15 seconds or until fine and crumbly. Add almost all the water, process 20 seconds or until mixture comes together; add more water if necessary. (It was quite hot here so I placed the pastry in the refrigerator for about 5-10 minutes before rolling the pastry.) Turn onto lightly floured surface, press together until smooth. Roll pastry to fit 20cm round fluted flan tin. Line tin with pastry, trim edges; refrigerate 20 minutes. Cut a sheet of greaseproof paper to cover pastry-lined tin. Spread layer of dried beans or rice evenly over paper. Bake 15 minutes. Remove from oven, discard paper and rice. Return to oven for 15 minutes, or until lightly golden.

    Filling:
    3 egg yolks
    2 tablespoons caster sugar
    2 tablespoons cornflour
    1 cup milk
    1 teaspoon vanilla essence

    To make filling: Place egg yolks, sugar and cornflour in bowl, whisk until pale. Heat milk in small pan until almost boiling, remove from heat. Add milk gradually to egg mixture, beating constantly. Strain into pan. Stir constantly, over low heat 3 minutes or until it boils and thickens. Remove from heat, add essence. Transfer to bowl, cover with plastic wrap; cool. 

    Clear glaze
    1/4 cup granulated sugar
    1/2 cup water or fruit juice (clear apple juice)
    1 tbsp corn starch or potato starch
    1 tbsp corn syrup

    To make glaze: Bring sugar to boil with half of the water or fruit juice. Dissolve cornstarch in the other mixture cook. Stirring until mixture thickens and clear. Stir in corn syrup. Bring to boil then remove from heat. Cool before brushing over top of fruit.

    To assemble tart: To remove the tart from the fluted sides of the pan, place your hand under the pan, touching only the removable bottom not the sides. Gently push the tart straight up, away from the sides. The fluted tart ring will fall away and slide down. Spread a thin layer or apricot glaze or melted chocolate over the bottom and sides. Spread filling in cooled pastry shell. Decorate the tart,  you'll need 2-3 cups of mixed fruits (berries, sliced kiwi, plums, bananas, pineapple or melon). Arranging the fruit on the tart can be done either randomly or in concentric overlapping circles, starting at the  outside edge. Try to cover all the pastry cream with fruits so that no pastry cream is showing through. Brush gel over fruit with a pastry brush.

    This fruit tart is best eaten the same day as it is assembled. Cover and refrigerate any leftovers.

    Here is another picture of my strawberry tart.

    Sunday, April 11, 2010

    Lemon Cream Cheese Frosting

    No cake is complete without a frosting. Even if you use from the cake mix recipe. I made a simple lemon cream cheese frosting for my golden butter cake. The result was sweet, tangy, and delectable. It was fantastic!

    Lemon Cream Cheese Frosting
    Ingredients:
    • 1 (8 ounces) package cream cheese
    • 1/4 butter, softened
    • 3 tbsp lemon juice
    • 2 tsp lemon zest
    • 1 tsp vanilla extract
    • 4 cups confectioners' sugar
    Beat cream cheese and butter. Then add lemon juice, lemon zest, and vanilla extract together until smooth and fluffy. Add confectioners' sugar gradually until finish; beat until creamy. Add more icing sugar or juice as needed for easy spreading.


    Notes:
    • Use fresh lemon and squeeze the juice out, much better than using lemon extract only.
    • It is very important that the frosting be the proper consistency so it spreads easily over the baked good, yet at the same time adheres to the surface. 
    • Never frost a cake or other pastry that is still warm as the frosting will melt into the baked good or become too thin and run.
    Have a good week ahead. :))

    Thursday, February 11, 2010

    Simply sensational truffles ♥♥

     
    These rich and elegant (mine not so elegant.. lol), bite-sized petit four Chocolate truffles.. hmm.. yummy..  Simply could not resist any one of them... yesss.. that's including any flavors.. I like them all.. hehe.. I am thinking of making truffles as one of Valentine's present for my hubby. *wink*  I think these truffles perfect as party desserts or for a present because they are so easy to make. Simply sensational!! :))
     
    Recipe from Kraft (check out their video)

    Ingredients:
    2-1/2 pkg. (8 squares each) BAKER'S Semi-Sweet Chocolate (20 squares), divided
    1 pkg.  (8 oz.) PHILADELPHIA Cream Cheese, softened
    decorations: chopped PLANTERS COCKTAIL Peanuts, multi-colored sprinkles 
     
    MELT 8 chocolate squares. Beat cream cheese with mixer until creamy. Blend in melted chocolate. Refrigerate until firm. 
    SHAPE into 36 balls. Place on waxed paper-covered baking sheet. 
    MELT remaining chocolate. Use fork to dip truffles in chocolate; return to baking sheet. Decorate, then refrigerate 1 hour.
     

    Wednesday, December 23, 2009

    Date and Cinnamon Squares


    I would like to wish everyone a Merry Christmas. I'm so looking forward to spend time with hubby as he don't have to work for 4 days. Yay!! Talking about Christmas, I like to see the decoration of some houses in this town,  very bright and colorful. There's not much of decoration at the streets, unlike in Singapore, Orchard Road and all the shopping malls, definitely, have beautiful decorations. We didn't do much, just a Christmas tree. It was fun, decorating it together. Due to in tight budget, we decided to recycled everything that we used last year for our tree. Perhaps next year, we have a better tree and decorations. :)


    Anyhoo, today recipe is Date and Cinnamon Squares. I had 2 containers of date that have been sitting in my refrigerator for a while. At first, I thought of making cookies with it but I changed my mind. The recipe said 600g of dates, I was like, wow that's a lot of dates!! But after chopping and mixed with water, its not much as I thought. I really hate the chopping part. I cant believe, after chopping those dates I got a blister on my finger! Lol!!!! Well, it turned out good. Hubby loves it! :)

    Date and Cinnamon Squares
    (BAKING A Common Sense Guide Book by Bay Books)

    Ingredients:
    600g (3-1/3 cups) pitted whole dried dates, chopped
    1 tsp bicarbonate of soda (baking soda)
    125g (4-1/2 oz) unsalted butter, chopped
    155g (2/3 cup) soft brown sugar
    2 eggs
    125g (1 cup) all-purpose flour
    60g (1/2 cup) self-rising flour
    1/2 tsp ground cinnamon, plus 1/2 tsp, extra
    60 g (1/2 cup) Icing (Confectioners') sugar

    1. Preheat the oven to 350○F / 180○C. Grease a 9 in (23cm) square shallow tin and line the base with wax paper.
    2. Combine the dates and 500ml (2 cups) of water in a saucepan. Bring to the boil, then remove from the heat. Stir in the bicarbonate of soda and mix well. Allow to cool to room temperature.
    3. Cream the butter and sugar in a large bowl using electric beaters until pale and fluffy. Add the eggs one at a time, beating the cinnamon into a bowl, then fold into the butter mixture alternately with the date mixture.
    4. Spread into the prepared tin. Bake for 55-60 minutes, or until a skewer inserted into the center comes out clean. Cool in the tin for 5 minutes, then turn out onto a wire rack to cool completely.
    5. Cut into 36 pieces and place on a sheet of greaseproof paper. Sift the combined icing sugar and extra cinnamon over the cubes and toss to coat.  Serve immediately.

    Notes:
    • The coating will be absorbed into the cakes quite quickly if left to stand.
    • Do not coat with the icing sugar if you intend to store them. 
    • Stored in an airtight container, for up to 4 days, or up to 3 months in the freezer.
    Happy Holidays!

    Monday, November 30, 2009

    Triple-Layer Chocolate Bars


    The Triple-Layer Chocolate Bars sounds like difficult but it is easy to make and use just a few ingredients. I made these last night. Since it just takes 2 hours to set in the refrigerator, I wanted to wait to try these bars.  After cleaning the kitchen, my eyes and body just couldn't wait any longer. I went to bed early last night. So, we had one bar each as desserts for lunch today. Its just funny because, I was hesitated to take a bite. Chocolates are  my favorites and its the reason why I made these but I dunno why there was a hesitation.. LMAO!!! Well, hubby tried first then me. He said its delicious, chocolaty and very rich... One bar is good enough since my bars were a little too big.. I overlooked and had 15 big bars instead.... should have cut it a little smaller to get 24 bars as said in the recipe.... hehe..
     
    Triple-Layer Chocolate Bars from Kraft Foods 

    Ingredients
    1 pkg (8 squares) BAKER'S Semi-Sweet Chocolate, divided
    10 tbsp butter, divided
    1-1/2 cups HONEY MAID Graham Cracker Crumbs
    1 pkg.  (4-serving size) JELL-O White Chocolate Flavor Instant Pudding, or any flavor (I used french vanilla flavor instead) 
    2 cups powdered sugar
    1/2 cup heavy whipping cream 
     
    LINE 9-inch square pan with foil extending over edges to form handles. Microwave 4 of the chocolate squares and 5 Tbsp. of the butter in large microwavable bowl on HIGH 2 minutes or until butter is melted. Stir until chocolate is completely melted. Add crumbs; mix well. Press firmly onto bottom of prepared pan. Refrigerate 10 minutes. 

    MICROWAVE 1/3 cup water and remaining 5 Tbsp. butter in large microwavable bowl on HIGH 1 minute or until butter is melted. Add dry pudding mix; stir 2 minutes or until completely dissolved. Gradually add powdered sugar, stirring until well blended after each addition. Spread over crust. Refrigerate 15 minutes or until firm. 

    MICROWAVE remaining 4 chocolate squares and cream in medium microwavable bowl on HIGH 2 minutes. Stir until chocolate is completely melted and mixture is well blended. Spread over pudding layer. Refrigerate 2 hours or until set. Lift out of pan onto cutting board. Cut into 24 bars to serve.

    Notes:
    • It's best to use plastic bowl when mixing the pudding and use rubber or silicone spatula to spread over the crust.
    • For perfectly clean-cut, dip the sharp knife in warm water, wipe it dry between cuts.
    • Store leftovers in an airtight container in refrigerator.
    • It is not necessary to use the indicated brands, you can use the local brands, they are just as good. :)

    Thursday, November 12, 2009

    Mocha Cheesecake


    This lovely recipe is from my friend in VA. She said she and mocha have something in common... LMAO!!!!

    My hubby drinks a lot of coffee and this cheesecake is good for him. When he came home for lunch today, I just had to let him try the cheesecake before he goes back to work. So... after he takes the first bite, he gave me, thumbs up and said "bake this cheesecake from now on..."  I was so happy that he likes it.

    But initially... After I took out the cheesecake from the oven, I thought I had baked it too long, that's why there were some cracks. It also rose high, then I left it to cool down and later, when I checked on it again, it already shrunk.. lol.. I thought my cheesecake won't be any good.. It was funny too because, I didn't take the first bite, I let hubby do the honor. Lol!!(dont tell him, he is my "guinea pig" to try all my cookings.. just kidding hun... but I guess he already know... hehe). Then I took my first bite and I really think the mocha cheesecake is so yum yum delicious!!  It tasted like the store cheesecake or perhaps even better than the store cheesecake.. Lol!!! Although the top is not pretty as the ones at the stores, the taste, was superb. We really enjoy a good cheesecake!

    Many thanks Zee.♥♥♥  I'll bake one for you when you come visit..;)


    Mocha Cheesecake

    Crust
    2 cups chocolate wafer crumbs (about 32 wafers) (I used vanilla wafers and add 2 tsp of cocoa)
    1/2 cup sugar
    1/2 cup butter, melted

    Filling
    3 packages (8ounces each) cream cheese, softened
    1 cup sugar
    3 tablespoons all purpose flour
    4 eggs
    1/3 cup heavy whipping cream
    1 tbsp instant coffee granules
    1 tsp vanilla extract
    1 cup (6 ounces) miniature semisweet chocolate chips, divided


    In a bowl, combine crumbs and sugar; stir in butter. Press onto the bottom and 2 in. up the sides of a greased 9-in. springform pan; set aside.

    In a mixing bowl, beat cream cheese and sugar until smooth. Add flour and beat well. Add eggs, beating on low speed just until combined.

    In a small bowl, combine cream and coffee; let stand for 1 min.

    Then add to the cream cheese mixture with vanilla; beat just until mixed. Stir in 3/4 cup choc chips. Pour into crust. Sprinkle with the remaining choc chips.

    Bake at 325 F on the middle rack for 50 mins or until center is almost set.

    Cool on wire rack for 1 hr. Refrigerate overnight. Removes sides of pan let stand at room temperature for 30mins before slicing.


    Notes:
    1. If you want to bake this cheesecake, I would advise to bake it one day earlier since you need to bake and keep it in the refrigerator for few hours (at least) or overnight before you finally slice the cheesecake.

    Saturday, October 03, 2009

    Chocolate Eclairs Square

    Our close friends had a cookout today and I had promised them that I will make a dessert for the cookout. Yesterday, I was still thinking which dessert? Should I make a pie, warm dessert, fruity dessert or no-bake dessert... I checked my dessert recipes books and the Internet.. so many delicious desserts.. I cant decide which one I really want to make so I asked my hubby for help. I gave him 4 types of desserts and asked him to choose one.... Oh boy!!! It was the right choice!! Chocolate Eclair Squares!!! They were FABULOUS!!! I said it again FABULOUS!!! This recipe is very easy, inexpensive and quick. No bake, just need 4 hours to chill. I got up early this morning, and start making this dessert. I also added something extra to my dessert.. Chocolate frosting!! At the cookout, everybody enjoyed it specially my hubby. The twins' mom is very picky about her food and I was so happy when she tried and said "its very gooood......" :) :) This recipe is definitely a keepsake. Thanks Kraft Foods for this fabulous dessert!!!!

    Chocolate Eclair Squares
    Recipe from Kraft Foods.

    Ingredients

    2 pkg. (3.4 oz. each) JELL-O Vanilla Flavor Instant Pudding
    2 cups cold milk
    1 tub (8 oz.) COOL WHIP Whipped Topping, thawed
    64 NILLA Wafers
    2 squares BAKER'S Semi-Sweet Chocolate

    Beat pudding mixes and milk in large bowl with whisk 2 min. Stir in COOL WHIP.
    Arrange 16 wafers on bottom of 8-inch square dish; cover with 1/3 of the pudding mixture. Repeat layers twice. Top with remaining wafers. Refrigerate 4 hours.
    Microwave chocolate in microwaveable bowl on HIGH 1 min or until melted when stirred. Drizzle over dessert.


    Beginning......


    Layered.....


    (@ the cookout) I snapped a picture before it runs out... hehe...


    The twins' mom made this delicious orange cake! oh boi! I brought back some for a midnight snack!! LoL!!!!! :P

    Related Posts Plugin for WordPress, Blogger...