Wednesday, March 31, 2010

Chicken Rice (Hainanese Chicken Rice)

Our dinner tonight was home cooked Chicken Rice. Last night, as I was chatting with my sister, we decided to cook Chicken Rice for our better half.

After my first attempt to cook chicken rice had failed, I asked my girl friend in Virginia how she cooked hers. She taught and gave me her recipe. So this is my 2nd time to whip up the Singaporeans favorite dish. When I checked my pantry, I was worried because I have less than half a cup of long grain rice. But luckily I still have some of the Japanese rice and thought maybe I could try to use it for my Chicken rice...

In Singapore, you can find chicken rice anywhere at the hawker center or food court. It’s often called Singapore’s national dish. There are variations of this dish, which include the use of roasted instead of steamed chicken. (I prefer the roasted.) The dish is usually served with chilli sauce and dark soy sauce with slices of cucumber and tomato. The ingredients may looked a lot but it is simple and easy to make a nice delicious chicken rice. My ingredients and methods here are a little different from the authentic Hainanese Chicken Rice but it was real tasty and filling meal. My chicken rice is served with chilli and garlic dipping sauce, soup and a side dish of broccoli and carrot "chap choy"(mixed vegetables). *yum-yum*

Chicken Rice (recipe given by ms Z.S.)
Serves 2
Ingredients:

For the Broth :
4 chicken drumsticks plus 2 chicken thighs
water
2 cloves garlic + 2 clove garlic-minced
2-inch ginger

Marinate:
1 tbsp light soy sauce
1 tbsp oyster sauce
1 tbsp honey
1 tbsp vegetable oil

Directions:
Place the chicken into a large pot and cover with water. Throw in garlic and ginger. Bring to a boil, reduce the heat and simmer for 20 minutes. (Retain the water that the chicken was cooked in.)
Remove chicken and marinate with minced garlic, light soy sauce, oyster sauce and honey for about 30 minutes.
When cooking the rice, heat the oil in the pan and pan-fry the marinated chicken until lightly browned. 

For the Rice :
1 cup rice - washed and drained
2 cups chicken broth
2 cloves garlic - peeled and smashed
1 medium onion - peeled and quarter
1-inch ginger - sliced
1 pandan leaves (screwpines leaves) - optional
1 tbsp of vegetable oil
salt to taste

Directions:
Heat the oil in a pot. Add the garlic and ginger and saute until fragrant. Add the rice, onion, pandan leaves and chicken broth and bring to a boil. Reduce the heat, cover and simmer until the rice is tender, about 20 minutes.

For the Soup:
2 cups of chicken broth
1 tbsp of grind onion
1 stalk of green onion
a dash of white pepper
salt to taste

Directions:
Heat the oil in a small saucepan. Add the onion and saute until fragrant. Add chicken broth and green onion. Add white pepper and salt to taste. Let it simmer and remove from heat.

For the Special Chilli sauce:
Preferably use fresh chilli but it is very hard to get these chillies here so I used packet chilli sauce that has garlic in it.
4 tbsp chilli sauce with garlic
1-2 chicken broth
1 tsp vinegar
1 tsp sugar

In a small saucepan, dilute the chilli sauce with the chicken broth under a low heat. Add vinegar and sugar. Add salt if necessary.


The way I eat my chicken rice.... pour the chilli dipping sauce and a few spoonfuls of the soup... to the rice, tear up your chicken and yum-yum.. oooh lala... :))

Notes:
Skim and discard any residual fat/oil from the chicken broth before cooking the chicken rice.

Monday, March 22, 2010

Karipap Pusing with Curried potatoes, sweet potatoes and ground beef.

My friend host a Project Karipap/Epok-epok (Curry Puffs) from March 13th, 2010 to April 13th, 2010 in Facebook. I've made the regular epok-epok before but this is my first attempt to make Karipap Pusing. Curry puff is a popular snack in Singapore and Malaysia. There are variety of fillings but usually the main filling is potato. Karipap Pusing is like epok-epok but karipap pusing is more crisp after frying because of the patten on the skin. 

I was in the mid of writing this post this evening, but hubs wanted to watch the movie Julie and Julia that we got in the mail today. So I had to save the blog and watch the movie with him. I expected the movie to be good, but it was even better than expected. Its a lovely movie. I really love the movie. After the movie was over, here I am back writing my blog..

Ingredients: 
Filling:
1 onion, chopped
a few curry leaves - for fragrance
1 cup ground beef
300 g potatoes, peeled and cut into cubes
200g sweet potatoes, peeled and cut into cubes
1 cup water
2 tbs beef curry powder - mix with some water to form a paste 
salt to taste
2 stalks spring onion
cooking oil

In a large saucepan, heat oil and saute the onion and curry leaves till soft and fragrant. Add in the curry paste and stir well. Add the ground beef, diced potatoes, diced sweet potatoes, salt and water. Cover. Cook until the potatoes are soften and there is no water left. Remove from heat. Add green onions and mix well. Let it to cool.

Dough A:
300g all-purpose flour
pinch of salt
1/4 cup canola oil/vegetable oil
1/2 cup lukewarm water

In a large mixing bowl , add salt to flour. Make a well in the center and add the oil and mix well with your fingertips. Add the water bit by bit until the dough does not stick to you hand. Set aside.

Dough B:
150g all purpose flour
100g butter/marjerin

Mix all ingredients in B till a soft dough is formed.


These puffs are meant to be fried. My attempt to fry these puffs were impossible.. They  crack,  break, burst or whatever you call it, when fried... I was filled with despair when looking at the puffs in the hot oil.. Could it be, the heat temperature was a little too high or my measurements could be inaccurate... I do not know.. I had to throw them away because they can't be saved.. (there were 6 pieces) :( So I had another option.... That is when I tried baking. I took a few pieces and placed in the baking tray and brushed egg yolk on the top. Baked in a preheated oven at 350F for about 40mins or until it turned golden brown. Once they were baked, they turned out great.. These puffs reminds me of the curry puffs that I usually get at Polar Singapore. *yum-yum*


Notes:

I found that after baking, my puffs did not really show the patten on the skin as much as when you fried them.

Friday, March 19, 2010

Classic corned beef and cabbage, carrots and potatoes....


When hubs came home, I saw plastic bags at the front door. He went to the supermarket (..without me...) after work. He said we are having corned beef tonight. I wasn't planning on having corned beef tonight but since he said it, I just agreed. Hubs is part Irish and he said this traditional Irish dish that is normally served on St. Patrick's Day and it is delicious.  (we had a belated St. Patrick's Day food... Lol...) As you know, what he likes may not be what I like so I was like okay, I give it a try... I suggested that he'll do the cooking tonight while I clean up the other room. Then the smell of corned beef and cabbage coming from the kitchen was fantastic but it's like taking forever to cook. By the time, it was done, I was so hungry. Well,  it was not bad as I thought it would be. It's lovely to have one dish associated with a day.. Kudos to hubs. Thumbs up!!! Love ya!

Ingredients:

3 pounds corned beef brisket with spice packet
10 small potatoes
5 carrots, peeled
1 large head cabbage, cut into wedges

Place corned beef in large pot or Dutch oven and cover with water. Add the spice packet that came with the corned beef. Cover pot and bring to a boil, then reduce to a simmer. Simmer approximately 50 minutes per pound or until tender.

Add whole potatoes and carrots, and cook until the vegetables are almost tender. Add cabbage and cook for 15 more minutes. Remove meat and let rest 15 minutes. 

Place vegetables in a bowl and cover. Add as much broth (cooking liquid reserved in the Dutch oven or large pot) as you want. Slice meat across the grain.  


 Enjoy and have a great weekend all. ♥♥

Sunday, March 14, 2010

Beef Briyani

When comes to briyani, using Basmati Rice is definitely better than the regular white rice.  Today I cooked some Beef Briyani and I was very happy how they  turned out. My hubs said my briyani was great but I need to work on my beef, it was a little too tough.. Lol.. roger that love...

The recipe may seem long, but actually briyani is one of the easiest to cook. Well, this dish is a meal in itself and needs no accompaniment, except for acchar or raita and poppadums. It is great for entertaining or a special occasion dinner too.

Although I do not have to cook anything else to go with my briyani, I wanted to try the Patchri (vegetable dish) recipe that my friend had given to me. While my briyani was in the oven, I looked at the recipe... dang!!! I do not have some of the ingredients. So in the end, I still have my patchri but my own version.. Next time, I'll try her version...

Ingredients:
2 large onions
2 garlic clove, chopped
1 inch piece of fresh root ginger, peeled and roughly chopped
small bunch of fresh coriander (cilantro)
6 candlenuts
1 tbsp curry powder
2-3 tbsp water
1 tbsp ghee or butter, plus 2 tbsp for the rice
2 tbsp vegetable oil, plus 1 tbsp
1-1/4lb (500g) braising or stewing steak, cubed
6 cloves
6 green cardamon
1 medium cinnamon stick
3/4 cup coconut milk or plain yogurt
1 cup long grain basmati rice (soaked for an hour)
2 cups water
1-2 teaspoon evaporated milk mixed with orange food coloring (I used yellow since I have no orange)
salt and ground black pepper
2 tbsp sultanas
some cashew nuts (optional)


Roughly chop one onion and place it in a food processor or blender. Add the curry powder, garlic, ginger, fresh coriander and candlenuts. Pour in the water and process to a smooth paste. Transfer the paste to a small bowl and set aside.

Finely slice the remaining onion into rings or half rings. Heat the oil in a heavy flameproof casserole and fry the onion rings for 10-15 minutes until they are a deep golden brown. Transfer to a plate with a slotted spoon.

Heat the ghee or butter in the casserole. Fry the cubed meat in batched, until evenly browned on all sides. Transfer the meat to a plate and set aside. Wipe the casserole clean with kitchen paper, heat the remaining oil and pour the paste made earlier. Cook over a medium heat for 2-3 minutes, stirring all the time, until the micture begins to brown lightly. Stir in all the additional spices with salt and ground black pepper and cook for 1 minutes more. Lower the heat, then stir in the coconut milk or yogurt, a little at a time. When all of it has been incorporated into the spice mixture, return the meat to the casserole. Stir to coat, cover tightly and simmer over a gentle heat for 40-45 minutes until the meat is tender. 

In another pot, throw in 2 cloves and ghee. Slowly pour in the soaked rice in the pot. Boil, uncovered. When the pot come to full boil, drain the rice out and let it rest. Use a oven proof dish and spread on layer of rice at the bottom. Sprinkle some of the colored evaporated milk, some of the fried onions and sultanas. Spread the beef in the middle. Cover with rice and sprinkle the colored evaporated milk again. Repeat the process if cooking more. 

Cover the dish with a foil and transfer to a preheated oven. Cook for 30 minutes at 200 degrees. Remove from the oven, carefully remove the foil. Sprinkle the remaining fried onions, raisins and cashew nuts before serving.

The dish may be served with Acchar, Malay Pickle or Raita and Poppadums.


I have my Beef Briyani with my version of Patchri, Poppadums and the beef thick sauce.. yum-yum!

Notes:

* Substitute for candlenuts = macadamia nuts
* You can use all the beef thick sauce in the rice or set some aside to serve as a side dish (like I did).
* Be careful not to overcook sliced onions (ops! I did it again!!), as it would give a little bitter taste.

Goodnight everyone and have a wonderful week ahead. :)

Friday, March 12, 2010

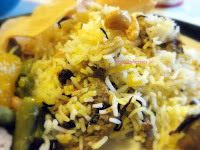
Chicken Nasi Briyani

While I was talking to my mum, I asked her how she makes her Nasi Briyani... so with a pen and my recipe book next to me, I wrote down the recipe given to me.

Nasi is a malay word for Rice. Briyani or Biryani means fried or roasted. Briyani was brought to the Indian subcontinent by Muslim travelers and merchants. This dish is popular in South-East Asia and in Arabia and within many South-East Asian communities in Western countries.

This is my first home-made Nasi Briyani from scratch. The way my mom taught me different version, no roasted or in the oven at the last stage... I think its the faster version.. hehe... I used the regular white rice but it's better to use Basmati rice. Next time, I will make Beef Nasi Briyani using the Basmati rice with a different method.  

Ingredients:
2 cups of rice - soak at least 30 minutes
4 cups water
4 cloves
4 green cardamon
1 bayleaf
1 cinnamon stick
2 tbsp ghee (minyak sapi)
1-2 tsp of evaporated milk mixed with yellow coloring

Chicken Thick Sauce
2 chicken breast - cut in cubes
1/2 tsp minced ginger
3 cloves garlic
1 medium onion
1 tbsp curry powder
1/2 tsp chilli powder
3-4 candlenuts (buah keras)
1/2 cup coconut milk or yogurt
1 tbsp ghee or vegetable oil
salt to taste
fried shallots (bawang goreng) 
1-2 tsp evaporated milk
yellow/orange food coloring


Think Sauce:
In a food processor, blend onion, garlic, ginger, curry powder and chilli powder until fine. Add candlenuts and press pulse about 2-3 times (just to make the candlenuts coarsely). Heat large saucepan on medium to high heat. Saute the blended mixture until the oil separates. Add chicken meat, and fry for 5-6mins, keep stiring so they do not stick to the base. Add coconut milk and continue to cook on medium heat. Turn off heat when the chicken is cooked.

Rice:
Heat ghee in a large casserole. Saute cloves, green cardamon, bay leaf, cinnamon till fragrance until nice aroma comes out. Add water to boil. Then add the soaked rice to boiling water. Cook rice as how you cooked your regular rice. (when the rice is cooked and is not shiny enough, add a little more ghee to the rice)

Layering:
In a the same casserole, remove some rice so that you have one layer of rice on the bottom. Sprinkle about 1 tbsp teaspoon of the colored evaporated milk on the rice. Sprinkle some fried shallots (bawang goreng). Put the chicken meat in the middle. Cover with rice and sprinkle another tablespoon teaspoon of the colored evaporated milk and fried shallots. Repeat the layers with the same order. Serve immediately.

The dish may be served with Acchar, Malay Pickle or Raita. (I didnt make any of those instead I made potato cutlet (bagedil).. hehe)


Notes:
  • For the thick sauce, you could make it dryer or have some gravy like I did mine, in the picture. 
  • If you do not have fried shallots, you can use red onions, slice very thinly and fried until golden brown.
Enjoy!

Friday, March 05, 2010

Roti Jala (Lacy Crepe)

Here is another hot favorite Malay Dish. Roti Jala are like crepes, only lacy. Roti Jala usually eaten cold. It is an alternative to rice, excellent with curry, rendang or kurma. I remember a few occasions my grandma used to make these delicious Roti Jala. Simple irresistable.. How I wish she is here to make me some of her delicious Roti Jala.. To make a fair amount of Roti Jala, it takes up quite a lot of time. I was running late cooking dinner tonight, so this time, instead of having it with curry, we had it will sweet soy sauce potatoes (just something I whipped up)... I think I still prefer with curry or rendang.. hehe... :)

Roti Jala is made by a special ladle with a five-hole perforation used to make the bread looks like a fish net. If you do not have any, the easiest way to have the special mould is by using a plastic cup with 4-5 small holes drilled into the bottom or sacrifice your measuring cup to make the special ladle. 

I found another special mould that we could use to make Roti Jala. Its like a ketchup squeeze bottle but it has 3 holes. I prefer the bottle instead of the special ladle because its not a lot of mess..  hmm.. it would be good for decorating my desserts too.. The bottle is available at a Japanese Store, (Daiso).. Anyone is Singapore could get me this bottle? hehe... *wink* Check this Youtube video.

Ingredients:
2 cups all-purpose flour
2 eggs
2-3/4 cups fresh milk or coconut milk
1 tsp ghee or margarine/butter
salt to taste
pinch of turmeric powder or a few drops of yellow food coloring

Sift flour into a mixing bowl. Stir in eggs. Add milk gradually and beat until batter is smooth. Strain batter and set aside.
Brush the non-stick pan lightly with ghee or oil. Heat the pan on high heat and bring to medium low heat. Pour batter into a roti jala ladle. As the batter flows through the holes of the mold, make circular rounds around the pan to form the netty patterns. After the top is set or when the bottom turns lightly golden pale color, no need to cook the other side, transfer the roti jala out and fold it into triangle shape or you can also roll them up. Repeat process until all the batter is finished.
Arrange a few on a serving plate with chicken curry on the side and serve immediately.

Notes:
  • If batter is too thick, you may have to adjust the consistency of the batter to make it thinner by adding water a little at a time so that it flow out from the spouts smoothly.
  • You can make ahead of time and freeze them. When you want to eat, just thaw and steam them before serving. It is still good. :)
Good night everyone. :)
Related Posts Plugin for WordPress, Blogger...