Wednesday, November 17, 2010

Honey Cornflakes Mini Cups ~ Eid-ul Adha

This year raya haji was confusing for me. I thought Eid-ul Adha is on 17th but after chatting with my friend, she said its the 16th here. I have plans to cook some raya dishes but since its a last minute, I whipped up a simple dish yesterday. At first, I thought I would cook the raya food today but after much considerations... hehe.. we are going to have a little different from having the tradition raya food. Will post it soon on that.

This morning, I'm sharing the super easiest Eid cookies that I baked last minute. They are crunchy, yummy and uses little ingredients. Honey Cornflakes mini cups.. You can add raisins, toasted groundnuts, toasted almond slices or just have it plain cornflakes. You can even get your little kids to help out and have fun. Definitely both the kids and the adults will enjoy these Eid cookies. :))

Ingredients:
50g butter
1 tbsp honey
2 tbsp brown sugar
3 cups cornflakes
1/2 cup raisins

Preheat oven at 325 Degrees Fahrenheit. 
In a small saucepan, melt butter, honey and brown sugar over low heat. 
Keep stirring until the sugar dissolved. 
Turn off heat and mix cornflakes and raisins. Mix well.
Fill the mixture into the mini cups. Sprinkles some nonpareils decors on top. (I also sprinkles a little of the fine crushed chocolate sandwich cookies and red sugar decors, they look just fine after baking.)
Bake for 5-10 minutes.
Cool completely before storing in an air tight container.


Happy Eid-ul Adha to each and everyone celebrating. :)

Tuesday, November 16, 2010

Honey Baked Chicken II


This honey baked chicken is delicious! It has excellent flavor and most importantly hubby loves it. :) The recipe is available at Allrecipes. After reading the reviews, I've made some changes to the recipe. I highly recommend this recipe!! Yummy!!!

Ingredients:
1 (3 pound) whole chicken, cut into pieces
1/4 cup butter, melted
1/2 cup honey
1/3 cup mustard
1 tsp salt
1 tsp curry powder
1 clove garlic, minced

Preheat oven at 350 degrees. Place the chicken in a shallow baking pan. Combine all the ingredients and pour the mixture over. (coat well). Baked them covered for 1 hour, turning halfway through. Then remove the foil, basted the chicken pieces again. Turn the oven up to 400 degrees, and baked them skin side up for an additional 15-20 minutes or until nicely browned.
Serve over white rice with steamed vegetables. :))

Monday, November 15, 2010

Fried Black Carrot Cake

Here is my fried black carrot cake. Gosh!! I miss eating fried carrot cake (be it white or black) in Singapore. Well, both of which are equally tasty and addictive! However, this can be only eaten moderately and not too often as this dish usually cooked with loads of oil. :))
When you make your own, you can add small shrimps or beansprouts if you like. Next time, I'll add some small shrimps to make it more yummier. hehe..

In the previous post, I've link a video of how to make the carrot cake but this time, I type it out just for you. :))

Radish cake
Ingredients:
350g rice flour
600g water, room temperature
600g hot water
40g carrots, grated (squeeze dry)*
40g radish, grated (squeeze dry)*

In a big bowl, mix rice flour with the room temperature water first. 
Mix the grated carrots and radish in the hot water. Then slowly pour the hot water mixture to the rice flour. Add salt and mix well. 
To thicken the mixture: Using a large pan/wok, add some water. Pour the mixture in a heatproof bowl. Now, you put your heatproof bowl in the large pan/wok. Stir, and mix well under a low heat until the mixture is smooth and thick. Transfer to a greased round pan (I used 8-inch round pan).
Steaming: Carefully, fit the round pan into the steamer, cover, reduce the heat to a simmer. Steam for 30 minutes or just until the radish cake is set and is firm to the touch. Check the water level regularly and replenish with boiling water, if necessary. Remove the pan from the steamer and allow to cool before using it.

(*changes: different from the previous post)


Fried Black Carrot Cake
Ingredients:
4 tbsp vegetable oil
3 cloves garlic, chopped
1-2 tbsp chai poh (preserved radish)
2 nos eggs, beaten
1 tbsp fish sauce
1-2 tbsp thick black sweet sauce
sambal (chilli paste) (how spicy you want it to be)
dash of white pepper
1-2 stalks spring onion, chopped
coriander leaves, chopped

Cut up steamed radish cake into small chunks.
Using medium high heat, in a non-stick skillet, fry garlic until just brown. Add radish cake chunks and fry till lightly browned and slightly crisp. Add chai poh. Fry till aromatic. Drizzle a little more oil if it is too dry. 
Add sambal (chilli paste) if you like and white pepper. Stir to coat evenly. 
Mix fish sauce in the beaten eggs, then pour in the beaten egg mixture. Allow the eggs to set slightly before flipping over in sections. 
Drizzle thick black sweet sauce and stir fry to mix well.
Before serving, sprinkle some chopped spring onions and coriander leaves on top. 


Notes: 

  • Cut the steamed radish cake into smaller chunks as they will crisp better. Crispy on the outside and soft interior. Yummy!!!!
  • If you like the fried black carrot cake to be a little wet, add some water after adding the sweet black sauce to fry until it has become softer and wetter.
  • You can make the radish cake ahead of time. Keep them refrigerated for days before frying it. 

Wednesday, November 03, 2010

Sharing Sushi

Seriously, I was disappointed. Firstly, my sushi looks awful and secondly, hubby was sick and I ate by myself. To make and rolling sushi was not as easy as I thought. I need A LOT of practice.. and the nori (seaweed) that I bought, I think was not the right one and when I opened the packet, some were broken. :( I tried but I will try again.. or maybe just go to a sushi restaurant for some delicious sushi. Today's post comes with no recipe but just want to share the following with you.. :)

Different types of sushi and rolls:

Sliced raw fish by itself - Sashimi. 


Chirashi-sushi - A bowl or bento box filled with sushi rice topped with a variety of fish and vegetables. 


Nigiri-sushi - Consists of an oblong mound of sushi rice that the chef presses into a small rectangular box between the palms of the hands, usually with a bit of wasabi, and a topping draped over it. Generally the most common form of sushi you will see. 


Gunkan Nigiri - Gunkan means boat and this sushi gets the name from the way the main ingredient is held in place on top of the sushi rice. It is in a boat shape.


Inari-sushi - Aburage (fried pockets of tofu) stuffed with sushi rice. 


Maki-sushi - Seaweed filled with fish and/or vegetables rolled up with rice on the outside. There are also more specific terms for the rolls depending on the style. They are:


Chakin-sushi - rice on the inside wrapped in a thin egg crepe


Futomaki - thick, large or fat rolls


Hosomaki - thin rolls


Uramaki - inside-out rolls (rice on the inside)


Tazunamaki - (Rainbow Roll) Maki roll with strips of fish and/or avocado across the top.


Temaki-sushi - Also called a handroll. Rice, fish and vegetables wrapped in seaweed shaped as a cone. The handroll has the same ingredients as Maki, the only difference is in how it is wrapped.

Here are some dining etiquette:
* Do not rub your chopsticks together. If you have to, do it under the table so the chef can't see you! Doing so implies that the chef is cheap (I must remember this coz I did it before.. hehe). 
* It is generally considered best form to eat sushi in one bite.
* It is OK to eat nigiri-sushi with your hands. Sashimi is only to be eaten with your chopsticks.
* Do not ask your chef "Is that fish fresh?"  Of course it’s fresh or the chef should not be serving it.
* Gari (ginger) is considered a palate cleanser and eaten between bites or different types of sushi. It is not meant to be eaten in the same bite as a piece of sushi.
* Slurping noodles is OK, less so for soup, but a bit is fine, at least by Japanese standards. You are expected to pick up your bowl to drink the soup, using your chopsticks to direct the solid pieces to your mouth.
* Eat them all. Try to eat all the food that is ordered, as it is considered bad manners to waste food. 

If you want to try Japanese, ‘domo arigato’ for ‘thank you’ and if you want to be more sophisticated, you might try “gochisosama deshita,” for “thank you for the meal.” You can use the less commonly used "oishikatta desu" for "it was delicious".

Tuesday, November 02, 2010

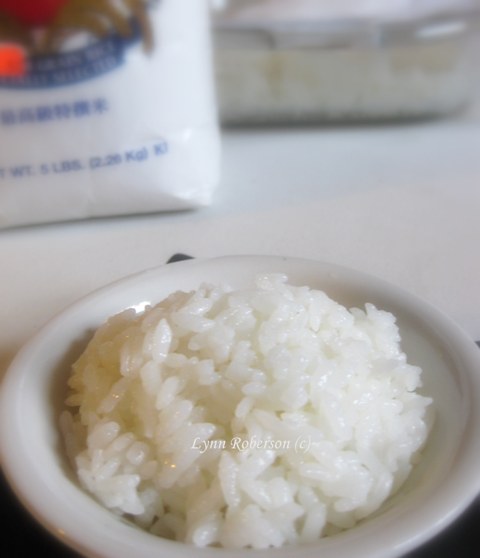
The Sushi Rice


Sushi rice is the most important ingredient in your sushi. The rice is a white, short-grain variety, which means the grains are very small and almost round. Short-grained rice contains a high percentage of starch when compared to other varieties, and this is why the grains are so sticky. While most rice loses its excess starch with a quick rinse under cold water, sushi rice will always remain sticky.

It is recommended to use a rice cooker.. hmmm.. NADA.. Do not worry!! Rice was always cooked with a pot before the rice cooker was invented.. so back to the old style... If you get some rice stuck on your pot, put water in it and soak about half and hour, and it will easily comes off.

Ingredients:
3 cups uncooked Japanese sushi rice
3 1/4 cups cold water
1/3 cup rice vinegar
2 tbsp sugar
1 tsp salt 

Wash rice in cold water until the water runs almost clear. This may take a few minutes. Once water runs semi-clear, drain rice of any excess water and add water. Bring the water and rice to a boil and cover with a lid. Once you put a lid on the pan reduce the heat and simmer for 20 minutes. After 20 minutes turn off the heat and leave covered for 10 minutes. **Do not to lift the lid during this last 10 minutes as the rice is still cooking even after the heat is off.

While the rice is cooking heat the rice vinegar, sugar and salt in a pan until dissolved. Remove from heat as soon as sugar and salt has dissolved.

How to make sushi rice with tools you already own...

Use a baking dish or Tupperware with a large flat surface so you can spread out the rice as much as possible. The only difference using the tools you already own is that you need to constantly fan the rice, since extra moisture will be evaporated when using a Pyrex or plastic material (make sure to use non-reactive material since vinegar is used). 

When the rice is ready, immediately transfer it to the baking dish while it is steaming hot. Drop the rice (upside down out of the pot) towards the center of the baking dish. While the rice is still clumped together, evenly pour the rice vinegar mixture over the rice by dripping it on the spatula. The vinegar will drain through the gaps between the rice. While cooling the rice with a fan, use the spatula and quickly flatten out the rice over the whole surface of the baking dish. Do not use too much force for it may smash or break the rice.
Keep cooling the rice with the fan and gently run the spatula through the rice in a grid pattern. This is to increase the surface area of the sushi rice to cool it faster and make it easier to flip in the next step. Give it a final cooling. Collect the rice to the other side while flipping in small amounts. Wet a paper towel and cover the rice. 


Now the sushi rice is ready to make some home-made sushi... :)

Related Posts Plugin for WordPress, Blogger...